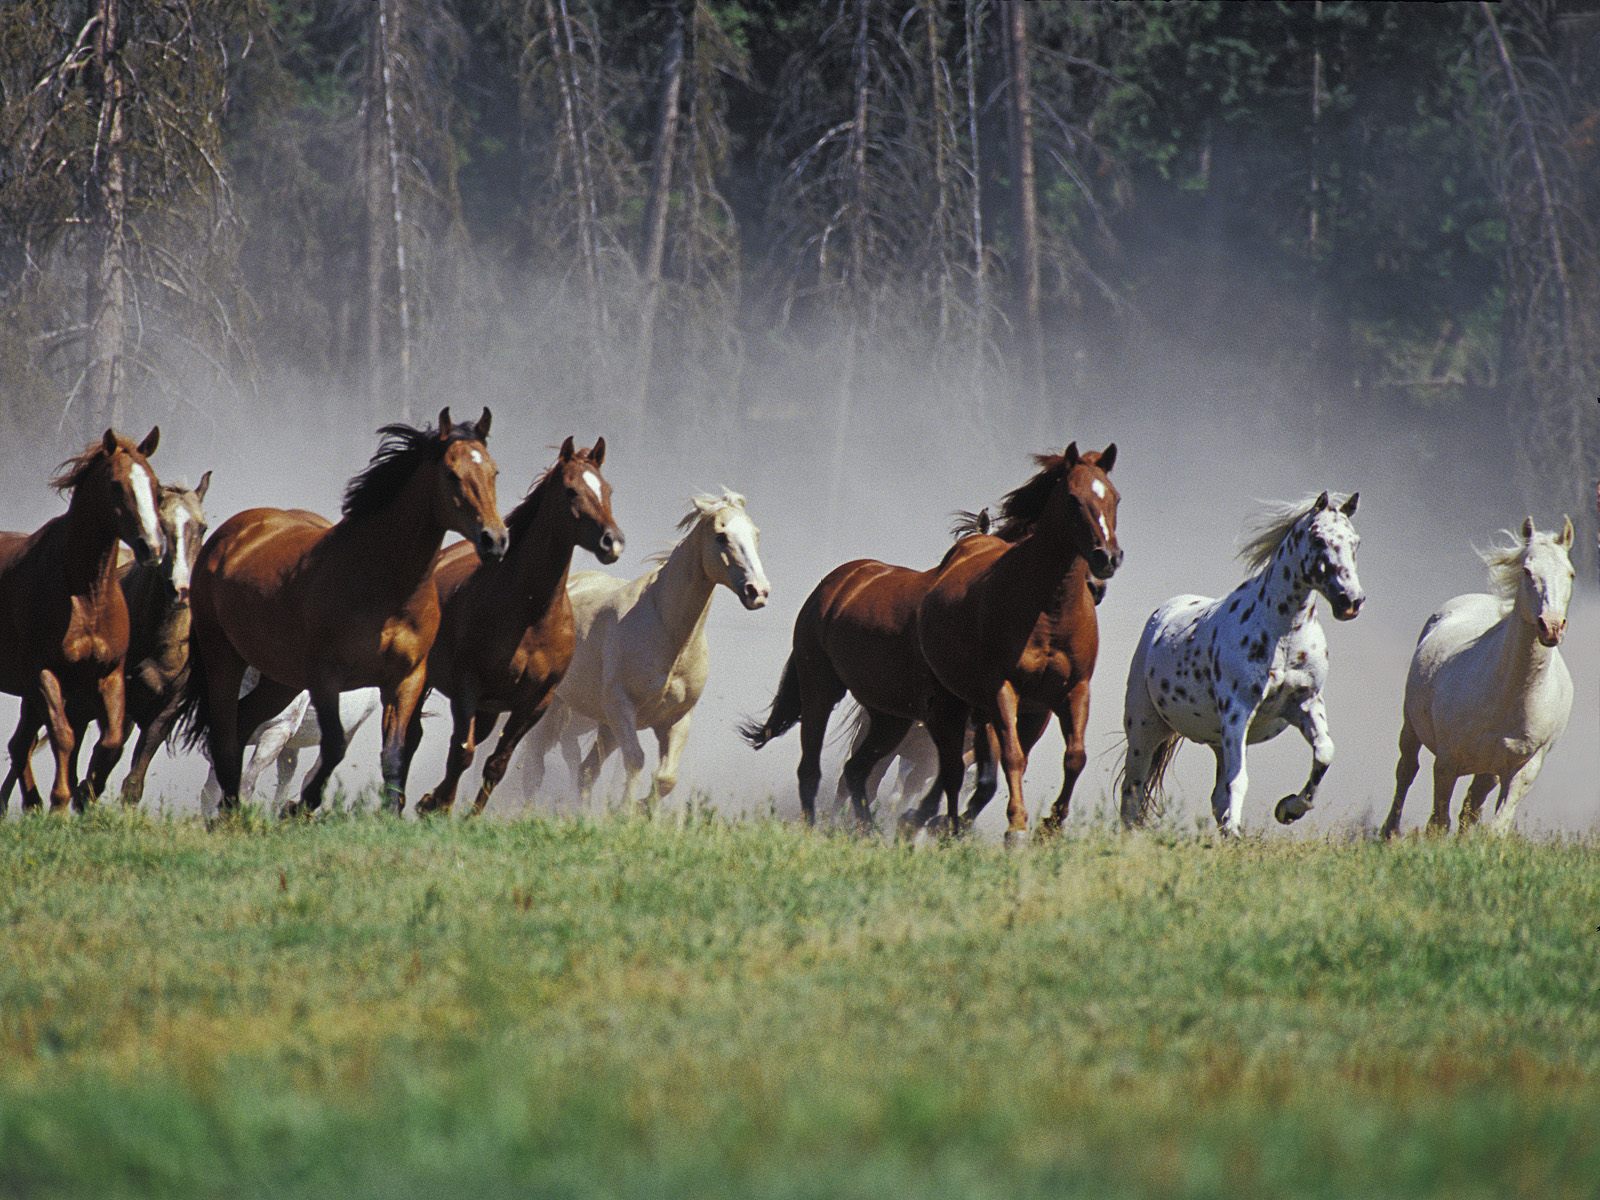
Training for the Trail

Training For The Trail

Trail riding can be great fun, and it can help with problems such as boredom and sourness in the ring. The benefits of trail riding can be an increased bond and greater trust between horse and rider, it can help a ring sour horse become more willing, it can help get a sluggish, lazy horse more forward. Trail riding can help teach a horse balance and agility and builds strength and stamina. However, one can’t just take any horse out on the trail, particularly if the horse has been used to a ring all it’s life. Taking an unprepared horse or rider out for an afternoon trail ride can not only be unpleasant and frustrating, but can easily become frightening and lead to disaster. In this article, I will tell you about the things I’ve found to be important for a horse and rider to know when wanting to get into trail riding that involves more than just a hour’s walk around the local fields.

In my more than 35 years of trail riding, my horse and I have covered a wide variety of terrain in all types of weather. We’ve been caught at the top of mountains in lightning storms, been struck indirectly by lightning, we have fallen off of a cliff, been caught in a quagmire, fell through seeming solid ground to an underground creek, gotten lost numerous times, had equipment breakage, episodes of companion’s horses tying-up on the trail. Once a friend and I had to race for help when one of our group fell off of her horse during a gallop and was seriously injured (that situation ended with a helicopter coming to take her to the nearest hospital), several times I’ve had to lead horses home when the rider was incapacitated, doctored horses injuries on the trail, as well as many more minor situations too numerous to list. From my experience, I hope to help other people and horses be prepared for this challenging and exciting activity. Because in my opinion there is nothing more physically and mentally demanding than a serious trail ride, nor an equine activity that is has more chances for encountering surprises. The situation is ever-changing, there is no constant. If you are looking to add spice to your riding, if you are bored with what you have been doing, trail riding may be just what you and your horse need. However, as I’ve mentioned, trail riding has it’s dangers. There will always be an element of risk to trail riding, so it’s best to be as prepared as possible. Being properly prepared will give you the confidence to go out and have a fun, relaxing ride, the confidence to tackle mountains and rivers; challenging horse and rider’s mental and physical fitness.

One thing I want to clarify, before I go any further, is that for the purposes of this article, I am assuming that the horse and the rider at least have a solid foundation of basic training. If a horse is going to start training for the trail, he should be very well-grounded in the principles of moving forward freely and energetically and accepting contact with the bit, has quiet balanced transitions and is rhythmic and relaxed at all gaits. In other words, the horse should should be at a level of training where the rider can apply the basic aids and the horse is willing and able to respond.

Keep in mind, that there are many ways to teach a horse a skill. I am only going to discuss what has worked best in my experience, and what instructions I give will be very basic outlines.

Mounted Skills

There are several maneuvers that a horse and rider should know and be able to perform without confusion or resistance. Nothing will shake a rider’s confidence quicker on a trail than not being able to control their horse properly. By this, I don’t mean that the horse is is uncontrollable, or that the rider is overmounted, but that the rider realizes what the horse needs to do, how the horse needs to move to get out of a potentially dangerous situation, yet also realizes they they themselves have no idea how to ask a horse for this movement nor does the horse know the cues. The situation does not even need to be particularly scary, either. If enough small problems, struggles, and frustrations occur, if the rider (or the horse) is constantly feeling unsure of themselves, confused, and feel as if they are not communicating with each other, they both can become discouraged about trail riding in general.

Neck Reining

Neck reining is something that is very handy for your horse to know. It’s not critical, but it sure can make things easier. Many times, if the trail is overgrown, I’ve pushed branches out of the way while maneuvering around large rocks or fallen trees or saplings growing in the trail. Often, we will use small, hand-held nippers to clear overhanging branches out of the way as we ride down an old trail. Neck reining allows us to clip as we walk. I’ve had to sometimes lead someone’s horse and neck reining is invaluable to maintaining control. There are also many little instances, such as drinking from your water bottle, or looking at a map, a GPS, or a compass. It’s not difficult to train a horse for basic neck reining. All one needs is a fence or building.

Walk the horse alongside the fence, staying several feet away from it. With the rein closest to the fence, ask the horse to start turning into the fence. Make sure that you use your weight, seat, legs and eyes properly when you pick up the rein. It’s really these aids that will help neck reining make sense to your horse. As the horse begins to turn into the fence, and you feel him set back on his haunches, use your outside leg to keep him activated and as he moves into the fence, release the direct rein and lay the outside rein on his neck. Push him firmly through the turn with your leg. Look in the new direction. At this point, the fence helps to finish the turn and keeps him bending, so releasing the inside rein won’t result in him straightening out. Make sure you release the direct rein as soon as he is committed to the turn and apply the neck rein for the rest of the turn. This way, the horse learns to listen to the neck rein, and not continue to depend on the direct rein. I will work back and forth along a specific section of the fence, always asking for the turns at roughly the same spot. Soon, the horse will start to anticipate turning into the fence as he approaches that area. It will become easier and easier to start your turn with the neck rein. Lightly bump the inside direct rein as needed to help bend the horse in the desired direction, but drop the contact the instant he gives to that direction. Keep the neck rein steady. Basically, you want the direct rein to become just a back up to the neck rein; eventually, it will not be needed.

Backing

I can’t say how many countless times I’ve been thankful for a horse that knows how to back quietly and will steer while backing. Some of the situations could have become nasty had my horse not been willing and quiet when I asked him to back out of something. Unfortunately, very few horses actually know how to back correctly under saddle.

Backing is best taught from the ground first. With the horse bridled, stand facing the horse, holding the reins in one hand. Take up some contact with the horse’s mouth and at the same time, lightly push on the horse’s chest. Give a cluck or tell the horse to “back.” When he takes just one step, praise him and walk forward for a moment. Stop and try it again. Your horse should back by relaxing his jaw, softening his neck and stepping backwards with a regular, even, confident step. Work on the ground until he will easily back correctly. From the saddle, the cues are to sit with your spine “braced” (this discourages forward movement), take up contact, then ask for movement with your legs. If you feel your horse rock forward as if to take a step forward, close your fingers on the reins. Do not, however, pull backwards on the reins. This only creates pain at the horse’s mouth and results in tension and resistance. One cannot “pull” their horse backwards. The horse moves backwards because the rider’s legs ask for movement, yet the spine and hands prevent him from going forward. The only direction left to him is backwards. The energy for a movement always comes from the rider’s legs, never the reins. For many, it’s very helpful to have a ground helper for the first try from the saddle. Have the helper stand in front of the horse, facing the horse, and push on the horse’s chest. Very quickly, the horse will learn the cues from the saddle. I suggest having a helper until your horse will back correctly and quietly. When the horse will back well in a straight line, then begin working on backing while changing directions. Poles on the ground to maneuver through, as well as barrels to back around are helpful.

Other Handy Mounted Skills
Leg yielding, sidepassing, turning on the haunches, and turning on the forehand are also very good things for the horse to know. When the horse moves too close to trees or holes or you need to pass something over to another rider, a sidepass (or even a leg yield) makes it easier to move the horse as needed. Many times, I’ve rode with friends who’ve had their knees banged up because the horse does not know how to move over sideways. Working your way through brush, avoiding roots, trash, and holes are all easier with a horse you can maneuver with your legs. The turns on the haunches and forehand are nice for doing an about face on narrow trails and moving through gates.

Turn on the Forehand
The turn on the forehand is the easiest one to start with. Begin on the ground. With the rein closest to you, gently tilt the horse’s nose toward you. While holding the rein, use your other hand to press on the horse’s ribcage, asking the horse to move his hips over. Work on this until the horse will cross the back legs over without moving forward. From the saddle, the aids are: Outside leg (the one toward which the horse will be moving INTO) is slightly away from the horse’s side, rider’s weight is heavier on the outside seatbone, outside rein is simply light contact (ready to stop forward motion, if needed), inside leg should be moved back a couple of inches toward the haunches, and is active (pushing) at the ribs, inside rein is keeping the horse slightly flexed around the inside leg. In the beginning, ask for only one or two correct steps, stop and praise. Walk around for a minute, then stop and ask for the turn on the forehand again. Eventually, build up to being able to pivot the horse 180 degrees.

Leg Yielding

From this, you can start to teach the leg yield. The objective of a leg-yield is to have the horse cross his legs over and go sideways while also walking forward. A very handy thing for avoiding obstacles on the ground or at the rider’s head level. Also handy for passing snacks from rider to rider. Ask the horse for a nice, forward walk. As he is walking, shift your weight into the direction you want him to go. Lets say we

want the horse to go to the right. The rider should sit heavier on the right seatbone, the right leg should be slightly away from the horse’s ribs, the rider’s left leg should be pushing firmly on the horse’s ribs, a little behind the girth. The right rein should have contact with the horse’s mouth and be opened into the direction of movement to “lead” him in that direction. The left rein should be gently flexing the horse’s nose to the LEFT, and holding the flex, with the rein brought close to the horse’s shoulder. This is called an indirect rein and encourages the shoulders to move over. An example of when a rider would use a leg-yield would be when the rider notices that their knee is in imminent danger of connecting with a tree. If you pick up the opposite rein and pull the horse’s head or even neck rein the horse away from the tree, the horse may turn (or not!) but in doing so, creating a turn/bend away from a tree bends the horse’s ribcage (thus your knee) INTO the tree as you pass by it. Leg-yielding away, however, moves the ribcage (thus your knee) AWAY from the tree. The horse will also be more willing to leg-yield over because it will not be turning his head away from following the horse in front of him.

Sidepassing
Sidepassing is similar to leg-yielding, in that the horse will cross the legs over, but when a horse is sidepassing, he will only be going sideways, without forward motion. Once a horse knows how to leg-yield, teaching a sidepass won’t take long. Use a fence rail or the side of a building. Stand the horse short distance off, and ask for a leg yield. As the horse approaches the fence, keep applying the leg and weight that asks for sideways movement, but allow the horse to straighten up. As the horse gets close to the fence, gently prevent him from turning. Keep him facing the fence by holding the reins wide apart. As the horse shortens his steps, keep your active leg pushing firmly while you maintain equal contact with both reins. When the horse moves sideways more than he moves forward, praise him and allow him to turn and walk off. Come back in a minute to try again. When training for both the leg-yielding and the sidepassing only ask for a few steps at a time, slowly build up to more, and always make sure you work in both directions.

Unmounted Skills
Now, what happens when you have to get off of your horse while on a trail ride? No matter how easy the ride, there will probably come a time when you need to dismount to fix something, even if it is just to tighten your saddle. Many things can require you to get off of the horse while out on a trail. You and your horse must be able to work together on the ground as well as when mounted. Here are two skills that are often overlooked when people are training for the trail.

Standing Quietly and Patiently
Often, when dismounting on a trail ride, there is no adequate place to tie the horse to. One of the most common reasons people need to dismount will be to examine the trail or obstacle in front of the horse to make sure it is safe to cross. Sometimes, you may need to clear things off the trail. A horse that jigs and dances and won’t stand still in line while someone else gets down is dangerous, particularly if there is not much room on the trail. One’s horse should stand still, quietly and patiently, when the ride has to stop for some reason. If you are the one that needs to get down, you don’t want your horse to fussing and fidgeting, either when someone is holding his reins/rope or if you have to tie him. You may not have much room to mount or dismount, and a horse that moves at the wrong moment during a mount or dismount can cause you to fall. You may need a rock or stump to help you mount, and a horse that stands still where you tell him to will make things much easier. If your horse gets his legs caught in something, being able to cue him to stand still may prevent serious injury while you free him. There are several ways to teach the horse to stand still on command. I will give you the technique that has worked best for me with any horse I’ve taught.

Get a longe line, and some treats, and go somewhere where you both can concentrate. Stand your horse in one spot, and come up with a specific cue to mean that you want him to stay still. I usually use the word “stand” at the same time I jiggle the line attached to the halter. Take one step back and pay close attention to the horse. The objective here it that the horse is not allowed to shift his feet. As soon as he takes a step towards you (or away, or whatever), tell him a sharp “no,” and give a jerk on the line, and move his foot back to the same spot. It he moves two steps, then move him back two steps to the same spot. Now here is where timing is critical. When he has stood for a SHORT time past his usual standing time, then reward him, and take him for a short walk. After a minute, stop, and set him up again, and give him the “stand still” cue, and take a step back again. Do this ad nauseum until over time, you can step back farther and farther, and he is standing for longer periods. With a longe line, you can get quite far yet still have control if he should start to leave. When he is doing well in your practice area, and this may take several days, then take him somewhere more distracting and do it again. My horse will now stand out in my yard with all that grass around him, while I go into the house to answer the phone, and not move. I can tack him up anywhere without needing to tie him, and have left him standing on the trail to move brush. He stands in a trailer quietly, and most importantly, he will stand like a rock while I put him anywhere to mount. I have mounted off of car bumpers, rocks, stumps, fences, fallen trees, anything that is available. I have told him to stand and have removed vines and hidden old wire fence that has gotten wrapped around his legs. So you can see, the ability to stand on command is very important. It’s not hard, just time consuming, and you have to be CONSISTENT with expecting him to stand every time, without moving one foot. If you allow one foot to move before you say so, he will not grasp the concept.

Leading Out on the Trail
Quite likely, however, at some point you will also need to dismount to lead your horse over something. Even nice, easy trails can have a tree fall across them, causing you to have to work your way around it. In some cases you may need to dismount to get past or over something. There have been times I’ve had to dismount and lead to cross very rocky ground or go down a hill that was slippery. Your saddle may slip and you find you are not at a place where you can stop and fix it and so must lead the horse to a better spot. Many times, I’ve seen people need to lead a horse over something, yet they have a very difficult time doing so. You see, leading a horse over an obstacle is very different than leading your horse in from the pasture. When you train a horse to lead under most circumstances, you want the horse to walk at your shoulder. You want the horse to walk when you walk, and stop when you stop. If you move to one side or the other, the horse should turn with you. When leading over obstacles, though, this could be dangerous. If the horse is too close to you and you lose your footing you may get stepped on. If the horse stumbles or starts to slide going down a hill, and he is directly behind you, you may get trampled. Most importantly, however, when a horse needs to (or you suspect he might) jump something to get across it, it is imperative that you be out of the way when the horse jumps. This requires the horse to stand and wait for a cue to move forward, allowing time for you to get across the obstacle and out of the way.

There will be times that you will want the horse to be able to walk directly behind you, such as when the trail is narrow, or far out to the side, away from you, such as when going down a hill. Therefore, it is very important to spend time teaching the horse how to lead and how to move according to his proximity and placement to you. Let me give you some examples of what I mean.

If I place my horse directly behind my back, as I would need to do when leading him down a narrow trail, he will walk when I walk, slow down when I slow down, pause when I pause. I don’t have to look back, and there have been times when I have even left the reins tied to the saddle. I have taught him to play “follow the leader” when he is placed directly behind me. Now, when I place him out to the side, as he needs to be when we are negotiating a steep hill, he also knows to move as fast or as slow, or to stop altogether to stay right beside me. The difference is that he knows to stay off to the side and pick his own way. He only needs to keep his head even or slightly behind my shoulder. For crossing obstacles, I give him the “stand still” cue, then with a sufficiently long lead, I cross whatever I need to, while he waits. Then with a cluck and a tug, I cue him that it is now his turn to cross.

None of this is difficult to teach, it simply takes time. Work with the horse in an enclosed area to begin with. Use brush, tarps, poles, etc. to lead across. I’ve used ramps, see-saws, and bridges that we’ve built for this purpose. I’ve also hung up tarps and strips of plastic, hung either horizontally or vertically, and led the horse through and under them. Practice until you and the horse can do these things without needing a leadline attached to the horse. Some extra benefits to this training is that it’s a great way to build a very strong bond and a very high level of trust between you and your horse. Trust and respect between horse and rider is probably the most critical element to having a good trail experience.

It will also help with issues such as trailering and poor leading/ground manners. For many people, being able to get their horse onto a trailer and hauling the horse out to the country is the only way they would be able to attend a trail ride. If a horse will trust you and follow you anywhere, he will follow you up into a trailer.

Trail riding is great fun for horse and rider if both are prepared. I hope this article has helped give people ideas and tips on what training they may need to focus on to improve their overall level of confidence and joy on the trail.

Heels

In this article and the three following articles, I will be taking a look at some of the common problems with rider position that, if left uncorrected, will be a hindrance both to the rider and the horse. Although all parts of the rider’s body are connected and they will all influence each other, I will be starting at the bottom and working my way up, since I feel that correct position and balance is the result of a good base.

THE HEELS

This is one of the most critical elements of balanced, relaxed riding, yet one of the most common problem areas. We’ve all heard the term “heels down,” and have been told that it must be done. Sounds simple, yet it is so difficult to actually do.

First, lets take a look at why it is such a common problem. I’ve often found that understanding the problem, understanding the reason behind why it is as it is, often relieves a great deal of frustration and makes it easier to solve.

The Everyday Heel

Humans remain upright and balanced as they walk by using their toes and ankles to make thousands of tiny corrections and adjustments to keep the body balanced above them. The foot has an inordinate amount of bones, ligaments and muscle for such a small area. It is at once extremely powerful and sturdy and flexible, sensitive and reactive. Everyday as we walk, we push off of the toes, bringing the heels up. Pushing and balancing on the toes and using our ankles to help stabilize us as we move is instinctive. If we stand on a small, narrow log or a narrow plank, one that does not have enough room for the entire foot, we would find that we would instinctively place our weight on the front part of the foot, the toes, in other words, so that we can balance effectively. This is even more pronounced if we have nothing for our hands to hold on to. Think of when you jump over a small ditch. On the landing side, the toes catch the body’s weight, balancing it and providing some cushion for the impact. All of this is natural and instinctive, and our bodies have learned to depend on the toes and ankles and foot actively working and tensing and DOING something. The rest of the body has learned to allow the foot to do most of the work.

Keeping these things in mind, it should come as no surprise that when the ball of the foot is placed on a small, narrow ledge such as a saddle stirrup, with the expectation (and hope) that the rest of the body will remain balanced above it, that the ankles and toes would immediately and instinctively spring into action to try to do the job.

The Rider’s Heel

The problem with allowing the ankles and toes to do the work of balance is that it IS work. In order to try to balance our bodies, the foot has to tense the muscles and ligaments and tendons. Unfortunately, when sitting on the back of a moving horse, any tension or resistance in the foot/ankle area will result in a struggle against the motion of the horse. The ankle area needs to be a shock absorber for the motion of the animal we are riding, plus the long stretch of the calf muscle, ligaments and tendons that is achieved when the heel is lowered has a pulling effect, that keeps the rider closer to the saddle. When we ask our feet to balance us, they must use those muscles and the way those muscles in the foot ,ankle, heel, and lower leg are used results in the heel coming up and the ankle tensing, the toes tensing and grabbing and the calf muscle shortening. All this is great if you want yourself propelled forward, as in taking a step. It’s not so great when you do NOT wish to be propelled forward, which is what happens when a rider falls by rolling off the horse’s shoulder. This is the most common way of falling exactly because the toes, ankles and heels have done what they do thousands of times a day:  they thrust the person forward. The instinct of the lower leg and foot to DO something to balance the person causes the person to shift the weight onto the toes. On the solid, immovable ground, this results in lightness and agility. (Think of boxers and gymnasts and martial artists.) On a moving horse, however, this results in a “fight” against the motion of the horse. Because we are struggling, we become more tense and the rest of the rider’s position begins to suffer.

The Fix

What riders have to realize is that this is an instinct and a natural way of moving for us. For many people, it will take a great deal of concentration and, just as importantly, a great deal of physical re-training to have the type of foot and ankle that we need to have to ride a horse well. The foot needs to learn that for the duration that it is in a stirrup, it is “on hiatus.” It’s not supposed to go to work, in fact, it’s not ALLOWED to go to work. It is no longer allowed to act as a balancing mechanism. The ankle, foot, and toes must be soft and relaxed, providing a passive weight-bearing area and allowing the ligaments and tendons to “bounce” freely with the motion and absorb shock. As the leg muscles stretch as a result, they will drag the rider into the saddle more firmly.

There are several exercises to help achieve this.

One of the most helpful is done off the horse and can be performed pretty much anywhere there is a step or ledge. Find a step or a small ledge and place the ball of your feet in the edge with the heels hanging off the edge, with the feet approximately shoulder length apart. Make sure you have something to hold on to, so as not to trigger the foot’s instinct to provide balance. Quietly stand there, allowing your body weight to push your heels down lower than the step. Use your hands to steady yourself and concentrate on totally relaxing the ankle. After it has sank as far as it will go, slowly raise yourself up on your toes. Stand on your toes for a minute and concentrate on how that feels. Then slowly allow your ankles and feet to relax and drop the heel down as far as possible. Repeat five times. Do this several times a day, if possible. When this begins to feel fairly comfortable and secure in the lowered position, begin to let go of the handhold. Eventually, work up to squatting and standing up, without a handhold, and without tensing up the foot or ankle. If you have steps, you can even progress to walking up the steps in the “heels down” position.

When mounted, a good exercise is to stand up in the stirrups while the horse is standing still, hold onto the mane and relax the ankle and lower the heel. After a minute, raise the heel above the toes, pause, and then slowly and deliberately lower the heels again. Concentrate on how it feels to drop the heels. You’d be surprised how “confused” the feet get when they are trying to do their instinctive job as a balancing mechanism and you are consciously trying to drop the heels! Often, it truly does take practice just to be able to drop the heels more than a mere centimeter or two. When you feel you have this under control, progress to doing the same thing with the horse walking.

Another good mounted exercise is to assume a “jumping” position using a firm handhold in the mane. This again places all of the rider’s weight in the stirrups, the same as the above exercise. Hold this position, relax the ankles to drop the heels and cue the horse to walk and trot.

Notice that I’ve always used the term “relax the ankles” to achieve the heels down position. I’ve found that too many times people are actively PUSHING their heels down. In my experience, thinking of “pushing” will encourage too much effort, resulting in tension. I’ve found it far more helpful to simply relax the ankles and allow the weight to sink. Try not to think of it as a physical effort, but rather a relaxing of effort. Concentrate on relaxing and picturing your legs as filled with sand and being long and heavy and, like sandbags, molding themselves to the horse’s sides.  Practice these exercises consistently and you will be well on your way to a lovely, long, relaxed leg and soft, lowered shock-absorbing heel.

Legs

THE LEGS

The legs are the connection between the rider’s seat and ankles, and as such are one of the most important elements of attaining true relaxation and suppleness on a horse. Together with the ankles, they are the base of a rider’s position.

PUTTING WEIGHT IN THE LEGS

To begin with, one should think of the legs as being the repository for most of the rider’s weight even though one’s weight may, in reality, be in the seat. Indeed, in some cases, all of the rider’s weight will be in the legs, and not the seat, depending on what one is doing while riding. However, I believe it is helpful to think of your weight being not so much in the center of the horse’s back, but down into your legs and down the horse’s sides no matter the activity. This allows the horse to know where you are, and to be able to receive your aids clearly, while it also enables you to feel the movements of the horse effectively and to anticipate his next actions. It will allow you to ride more balanced and will eventually allow you to attain a deeper more effective seat that is so necessary in dressage. A weighted leg will also help you to be more balanced and less likely to unconsciously lean side to side. Mentally placing your weight in your legs will allow your upper body to relax and create a more supple and natural ride.   You can achieve this mental weight by thinking of your legs as being two long bags of sand;  long and heavy sandbags falling down around the horse’s sides and molding themselves to the horse’s sides.

As with 80% of riding, this is a mental concept and if you can develop the right image and idea, mentally, you will be able to “feel” the weight drop into your legs. This is where the idea of a soft, relaxed ankle, discussed in the first article is important. For you to place your weight DOWN into your legs, and DOWN around the horse’s sides, you must be able to have a relaxed ankle, or else the stiff, resistant ankle will “push” your weight back up, again. If your weight is in your legs, draped down the horse’s sides, and your ankles are soft and relaxed, then you WILL have a good heel position for your discipline. This is often what is meant when instructors tell you to “drop your weight into your heels.” While this is a common way of explaining this, I have found it more effective, particularly for those wishing to ride more than one discipline, to use the concept of relaxed ankles in conjunction with weighted legs (as opposed to weight in the seat). What the the heels need to do will depend on the discipline and the length of stirrup. By mentally placing your weight in your legs and maintaining a relaxed ankle, you will automatically have the base you need for what you are doing.

Hunt Seat riding, for example, requires a shorter stirrup. Jumping is an integral part of Hunt Seat riding, and the shorter stirrup allows the riders to raise themselves out of the saddle for the jump. In this discipline, the weighted leg will keep the rider stabilized laterally on the horse, it will bring the rider back into the saddle when needed. The concept of weighted legs is critical when the rider’s seat has no contact with the saddle. When the ankle is relaxed and all the weight is in the legs, the weight will continue down the horse’s sides and will naturally push the heel down. The rider’s heel attains a dropped position by the weight of the legs. They are not forced into it by the rider actively thinking about pushing them down, which often causes tension in the legs and ankles. In Hunt Seat, the legs retain a bit more tension, or less relaxation, as they need to grip the horse’s ribs more firmly to provide more security during the flight phase and any cross country jumping or fox-hunting and also to raise and hold the rider in the jumping position.

Dressage riding, by contrast, does not have a need for the rider’s seat to lose contact with the saddle. In this case, the weighted legs, draped down the horse’s sides, pull the rider deeper into the saddle because of the longer stirrup length. The ankles remain relaxed, but the heels will not drop down as far, it is not as necessary that they do, since the rider maintains closer contact with the horse and does not lift entirely out of the saddle. For this reason, the rider’s legs will remain much more relaxed, though the muscles are still engaged. The longer, more relaxed, weighted legs allow the rider to communicate more subtly with the horse, and will allow the rider to more easily feel and respond to the horse, since the legs are, at all times, soft and supple. This is not to say that they do not ever do any work, Dressage is a lot of work, though it is subtle. What it means is that the legs are not required to provide the extra effort of supporting the rider above the saddle along with communicating with the horse. Any tenseness in the legs will often result in tenseness in the horse.

Western riding will also have a longer, more relaxed leg. This discipline also requires the rider to maintain contact with the saddle, so the applications of the longer, more relaxed leg will apply here, too. In many specific western disciplines, such as reining and cutting, long weighted legs are essential to keeping the rider in the seat.

THE POSITION OF THE LEGS

Next, lets look at the position of the legs in relation to the rest of the rider’s body. The legs are a connection between the feet and the pelvis, and should function the same way when one is on a horse as they do when one is on the ground. By that, I mean that they hold the pelvis directly above the feet when walking and standing. This is what they should be doing when you are on the horse. Balance is the same, no matter where you are, so if you cannot balance with your feet out in front of you when standing on the ground, or if you cannot balance with your feet back behind you, then you cannot do so on the horse, either.

There are several ways of determining if your legs are positioned correctly. One is to have someone place a straight line, like a lunge whip, from your ear, through the center of your shoulder, through the center of your pelvis, and just touch the back of the heel. Another way is to stand straight up in your stirrups and shift your feet and legs around until you can stand there without holding onto the horse’s mane, then gently sit down without moving your legs. Ideally, your legs should be positioned so that if the horse suddenly disappeared from under you, you would land on your feet and stay balanced above your feet. When your legs are positioned correctly, they not only hold you in a balanced position, but also act in conjunction with your ankles to absorb the motion of the horse’s movement. The hip joint, knee joint, and ankle joint need to “accordion” as the horse moves, so these joints must all be flexible and relaxed, yet at the same time firm enough to stay in place and support the rider, if needed.

THE PROBLEM

The problem here is that we tend to think of being on a horse as “sitting” on a horse, when in reality, we actually straddle the horse. If you were straddling something, lets say a small ditch, you would instinctively use your legs to hold your pelvis and upper body directly above your feet, even if you were to bend your knees. However, when you sit in a chair, your legs no longer feel they need to support the body, your feet go out in front of you, and you sit back on your buttocks. Think of how many times a day you “sit” like this. Habit is a VERY strong thing. If you mentally think of yourself as “sitting” on a horse, then your body will assume the position and the legs will take a coffee break, the same as when you “sit” in any other situation. Remind yourself when you mount your horse, that you do NOT “sit” on a horse, you STRADDLE a horse. This will go a long way to solving a variety of problems.

THE FIX

When you find your knees creeping up and your lower legs and feet creeping out in front of you, stop the horse. Take your feet out of your stirrups, and, one leg at a time, move your entire leg out away from the horse, so that no part of your leg is touching the horse. Bring your knees down and underneath you, as they would be if you were standing, then let your legs gently fall back against the horse’s ribs. Remember to mentally place your body’s weight down into your legs. (Or mentally hang sandbags off of them, or fill them with sand, whatever works for you.)

A very good exercise is riding without stirrups. When you take your feet out of the stirrups, drop your leg as far down as you can. Try to get your knee underneath your hips. This may involve some rather painful stretching in the groin area, but persevere; if those ligaments are tight, they will just have to stretch. Take care that your riding situation is such that you feel confident enough to maintain a relaxed position. If you are not comfortable or are inexperienced with working without stirrups, do nothing but walk the horse. If needed, have someone lunge you at the walk, or lead you. Slowly work up to being able to lift yourself an inch or two out of the saddle using your inner thigh muscle without losing your long, heavy leg, i.e., bringing up your knees or swinging your lower leg. Lift yourself up slowly, hold for a second, then slowly lower yourself. The raising and lowering will help train your legs to stay still and quiet and use the correct muscles when you post. When you are comfortable and have a consistent, steady leg, then try a few steps of a slow jog, or trot. Do just a few steps, and as soon as you feel any tension in your body, or feel your legs move out of position, drop back to a walk and get organized, relax, and try again. (One thing that I feel I should mention is that your spine will need to be supple and relaxed, especially when you are riding without stirrups, though we will focus on this at a later time. Suffice to say that you must relax your spine to take up the motion of the horse since at this point your legs and ankles cannot act as shock absorbers when they are not in the stirrups.) Work up to being able to ride without stirrups while the horse has a nice working trot. Always think of your legs as being the heaviest part of your body, pulling you downward into the saddle.

When you put your feet back in the stirrups, try to do so without moving your legs forwards or back.  Depending on the length of the stirrup, you may need to close the knee joint, but the trick is to do so without losing the hip-to-heel line. I find it helpful to think of straddling that ditch again, and picture how your knee angle would close if the ground moved upwards while your body stayed in the same space.

Seat, Spine and Shoulders

SEAT, SPINE AND SHOULDERS

In my opinion, the seat, spine, and shoulders of the rider are so closely connected and dependant on each other that they cannot be separated. They can each influence the other, but cannot work independently of the other, so in this month’s article, I’m going to group them together as one, though I will discuss each them.

FIRST, THE SEAT

The seat is one of the most important “aids” that a rider has, and yet I find that it is often the least utilized. Since it is often the repository for the majority of the rider’s physical weight as far as the horse is concerned and is most often in direct contact with the horse, a horse can’t help but be influenced by it. No matter what a rider does with their seat, no matter how they sit, a horse will always be aware of it, but unfortunately, many riders are not aware of what their seat is even doing, let alone are actively using it as an aid to help communicate and control the horse. A rider’s seat effects the horse’s steering and straightness as well as it’s speed and balance. The seat works in conjunction with the spine, and is what conveys the cues of the rider’s spine to the the horse. All of the seat’s influence is lost, however, when the rider is in the two-point position, or in any other situation when the seat is light or hovering above the saddle. Often, this happens when a rider is nervous or tense and they tend to “perch.” Having lost a very major line of communication to the horse, it’s not surprising that a rider who tends to crouch unconsciously will often struggle to control their horse. This type of ineffectual seat also destroys the rider’s balance and “base.” This is not to say that someone riding in a correct two-point position is an “ineffectual” rider. Done correctly, a rider in a two-point can be quite effective for what they need to accomplish, however, the reality of riding is that a two-point does not have as much control as a deep seat has. Very tricky jumping, such as Grand Prix open jumping and green or troublesome horses often require the rider to sit deep until the moment of lift-off, in order to keep the horse together. In Dressage, of course, a deep seat is critical to having complete communication with the horse.

First, lets look at how it can effect a horse’s steering and straightness.

Understanding the Seat’s Influence in Order to Use it Correctly

One of the most common things that can be wrong with a rider’s seat is that they have a tendency to sit heavier on one seat bone than the other. It is actually more common to be uneven like this than it is to be perfectly level and have the weight evenly distributed across both seat bones. Very often, sitting with the weight evenly distributed is something that takes a conscious effort and a bit of practice.

To see how a weighted seat bone can effect your horse, place your horse on the rail of the arena at a walk. Make sure that the horse is not directly behind another horse, but is basically alone and paying attention to you. Hold the reins by the buckle, don’t use any rein at all to steer. Now, sink more weight into the inside seat bone. Don’t actively push with the seat bone, just sit heavier on the inside bone. It’s often helpful to also think of treading a bit heavier on the inside stirrup. You will notice the horse’s inside ear flick back at you, acknowledging your weight, and then he will turn and start drifting into the middle.

Next, get your horse walking down the center of the arena and, again holding just the buckle of the reins, shift your weight to one seat bone (or step heavier in one stirrup, whichever image works better for you), and again you should notice the horse’s ear on that side flick back and then he will drift in that direction.

Conversely, if you want a straight line, you must sit with weight distributed evenly over both seat bones. One reason why people struggle to keep their horse straight is that they don’t realize that their weight is unevenly distributed across the seat bones and they are influencing the horse in one direction.

The seat can also be used to help balance the horse and control it’s impulsion and tempo when it works in conjunction with the spine. Since the seat, in this case, is more of a “conveyor” of signal than the “originator” of the signal, I will go over this aspect more while discussing the spine.

NEXT COMES THE SPINE

As we saw in the previous articles, anytime a weight-bearing surface of a rider’s body is in direct contact with the horse’s body, there most be a way to absorb the horse’s motion.

This is one of the first things a rider’s spine must learn to do. The spine must be relaxed and supple enough to move with the motion of the horse, providing shock absorption and connecting the seat and lower body to the shoulders, head and ultimately, the hands. When a rider has positional problems and seems to have too much “bounce” at a gait, banging around in the saddle, this can often be traced to a stiff, resistant, tight spine. Ideally, for the rider to be able to sit comfortably on all the gaits, the spine should be fluid and supple, moving with the motion of the horse and allowing the hips to freely follow the saddle. After a rider has learned how to work with and follow the horse with their spine, then they can begin to actively influence the horse’s way of going with their spine.

Understanding the Influence of the Spine in Order to Use it Correctly

Together with the seat, the rider’s spine is a critical aid for balancing and influencing a horse’s impulsion and tempo. When the rider is merely following the horse in a relaxed and supple manner, the horse and rider are both comfortable in the given gait. To the horse, this means that the rider is happy with that gait and doesn’t want to change anything. The rider is following the horse, therefore the rider is agreeing with what the horse is doing. If the rider does not signal something else, then the horse will naturally assume that the rider is perfectly happy with what is going on. This is fine if the rider truly is happy with what the horse is doing. A problem arises, though, when the rider is not really happy with what the horse is doing. Perhaps the rider wants to slow down, for examle.  If one pulls on the reins, yet continues to follow the horse with the spine and seat, then this gives conflicting signals to the horse. If the horse is eager to please or timid, then this will cause the him to become confused and frustrated. If the horse is dominant or argumentative, then this will give the horse an opening to ignore the rider’s wishes.

So in order to stop being a subordinate (if comfortable) passenger, a rider must now learn to use their spine and seat to control the horse. As I mentioned earlier, when a rider’s weight is in the saddle, the horse cannot help but feel what the rider is doing. This makes the seat and spine a very large part of the rider’s ability to control the horse’s impulsion, or forwardness, and balance. If the rider wishes to slow down the tempo of the trot, then the rider must first slow down the tempo of their posting. After the rider’s spine and seat establish the new tempo, then the reins will be more effective. The horse, having felt the change in tempo, and no longer being comfortable, will instinctively be seeking to “find” the rider again, the horse will want to find a rhythm that will feel comfortably in sync again with the rider. The same principle applies to the walk or the canter. If the rider wishes to change the horse’s tempo, then the rider needs to create that new tempo with their seat and spine. For reducing the tempo, this means to “brace” the spine against the current movement of the horse– to “hold” the horse with with their seat and spine. The spine resists the current motion of the horse, not allowing the seat to follow. When the horse reduces his tempo to where the rider wishes, then the rider’s spine relaxes and follows the horse’s motion again, thus telling the horse that this is “it.” To bring the horse to a complete stop, one would simply “hold” the spine, resisting the horse’s current movement, until the moment the horse halts, and then relaxes. Conversely, if the rider wishes the horse to increase the tempo, or lengthen the stride, then the rider must first establish the new tempo, or create more of a push with the spine and seat with each step, at which point the horse will be seeking the new rhythm and will be less inclined to resist the legs.

Actively using the spine and seat puts the rider in the controlling position. Too often the rider’s seat and spine do nothing but follow the horse’s every move, even when the rider is not satisfied with the horse’s way of going. Unfortunately, precisely because the rider is “following” the horse, this puts the horse in the controlling position. Very soon, the horse learns that no matter what they do, how fast or how slow they go, the rider will follow them and the rider will be the one to match the horse, who is establishing the tempo or rhythm. At the very least, such a passive seat and spine will make the rider’s reins and legs less effective. One of the more common sentences my students hear from me is “YOU set the rhythm–not the horse!” when they are having trouble maintaining rhythm or a designated tempo.

And, of course, the seat and spine is crucial to helping a horse balance correctly by being the mechanism by which a half-halt is applied. A half-halt can be a terribly confusing thing to do correctly, and volumes of articles and nearly entire books have been written about it, many of which can go into far more depth about it than I can in this article. A half-halt can be done with many different variations in the use, timing, and strength of the aids, depending on what one is needing the horse to do (balance and slow down the rhythm of the same gait, or balance and prepare for a downward transition, or balance and shorten the frame by bringing the haunches more under the horse).  The spine is an integral part and is the critical component in the horse’s understanding of why the half-halt is being applied and how he needs to respond.  While the fixed/holding rein is a part of it, and the active leg is a part of it, the majority of the half-halt and the horse’s understanding of what is wanted, is performed by the seat and spine.

Suffice it to say that if you are having difficulty understanding and applying a half-halt, then most likely you need to work a bit more on the “following” seat/spine and the the “active” seat/spine as I have described above. For it has been my experience that once one can instinctively follow a horse’s every move, yet also consciously control the horse when desired with the seat bones and seat/spine combination, then the half-halt is no longer such a mysterious, mystical, confusing and frustrating idea.

TOPPED BY THE SHOULDERS

While it is more natural for us to speak of our shoulders sitting on top of our spine and seat, as equestrians it is often more helpful to think of it as our seat and spine being suspended from our shoulders. The shoulders, being the crossbar from which the rest of the body hangs, must always be level and lifted, and relaxed.

Understanding the Influence of the Shoulders in Order to Use them Correctly

By level, I mean a line drawn from left to right across the top of the shoulders will appear level, with neither shoulder being higher than the other. By lifted, I mean that they are pulled back and are as high above the spine as they can be and while still maintaining relaxation and comfort. They should not “droop” over the rider’s chest. Unlevel shoulders will twist the spine like a question mark, causing the seat to “pop out” to one side or the other. This will cause uneven weight in the seat bones and can also cause one seat bone to push against the horse. This horse can react to this by throwing a shoulder out, bowing it’s body, or drifting constantly. Drooping shoulders will take all the slack out of the spine. This will prevent the spine from doing it’s job as a shock absorber and will inhibit the seat from easily following the saddle. Stiff, tense shoulders even if level and lifted, will effect the spine and the arms/hands, causing tension and stiffness in both and as we’ve just discussed, in order to communicate, the spine must be free and flexible and able to move or “hold” as the rider needs. Stiffness and tension in the rider’s spine effectively makes it “dead” to the horse . Since the spine and seat are critical aids to the rider’s control and communication,  incorrect shoulders can be an enormous hindrance. Stiffness in the shoulders also interferes with the rider’s arms, making them bounce. This will often result in the horse getting jabbed in the mouth.

To make sure your shoulders are correct when mounted, first take a deep breath, hold it, and then exhale as you relax. While the horse is walking, have someone stand behind you as you ride away from them and check the levelness of your shoulders. Finally, have someone stand off to one side and watch you ride by. When looking at your profile, you should not appear to be leading with your shoulders, but rather with your chest. Once you learn to keep your shoulders correct at the walk and trot (both sitting and posting) the canter should not be too difficult. The only time the shoulders are in front of the chest is in certain phases of Hunt Seat riding. However, while the shoulders do move in front of the chest, such as in jumping, in a correct Hunt Seat form they are still lifted, and are in no way droopy or sloppy or appear to be oozing down around the chest.

Arms and Hands

The Arms and the Hands

There are three types of hands that a rider can have: bad hands, good hands, and educated hands.

In this article, I will not be going in depth into what constitutes the correct hand and arm use for each discipline. There is, however, certain concepts and certain basics that are the same for every type of riding, and it is those things that I will be discussing, so that one may develop a good foundation to build on to develop the correct hands for their discipline. In addition, green, or inexperienced, horses are all started basically the same regardless of the discipline, an it is only later as the horse becomes more advanced that a truly specialized way of using the arms, hands and reins are needed.

This is an area that gives nearly everyone some trouble as some point. The main reason most people experience problems with their hands and arms while riding is that there are many ways to have “bad” hands. Plus, what constitutes “good” hands for one horse may not be “good” hands for another horse, depending on it’s temperament. This concept also varies between disciplines; what is correct hand and rein position for Hunter/Jumpers is not going to be correct for Dressage, and neither will be correct for Western. It’s small wonder that “good” and “sensitive” hands is one of the most difficult things for some people to understand, let alone develop and even less surprising that many riders never develop “educated” hands..

Specialized areas such as neck reining in Western or the upper levels of Dressage, and the arm, hand and rein usage for the advanced levels of such specific disciplines, would require an entire article for each one. By the time a rider reaches these levels, they should already have good hands (and should be well on the way to developing educated hands), and be beyond the basic problem areas.

What I am going to look at in this article is the problems with getting to those levels.

The Everyday Hands and Arms

First, lets look at what often causes so much of the problems that people have when trying to develop good hands.

Humans are very hand oriented. We depend nearly completely on our hands to get us through life. Our entire civilization is built on things that depend on our fingers and opposable thumb. Nearly anything in our human world can be fixed by using our hands, nearly anything can be accomplished using our hands. Recently I had shoulder surgery and had my arm immobilized. Using my hand to grasp something, even wiggling my fingers was painful for a while. It was absolutely astounding how inconvenient it was to do anything at all when only having the use of one hand when I had been used to two! Having experienced the awkwardness and inability to perform as I had been used to with the temporary loss of one arm and hand, I found it nearly inconceivable to to imagine having to accomplish something without using any hands at all.

In fact, as humans, using our arms and hands is so instinctive that it’s not till we lose the use of them that we even realize how dependant we are on them. Remember my first article of this series on heels? One of the exercises for developing a stretched heel was to stand on the edge of a step to allow the heel to sink down below it. In order to allow the leg and ankle to totally relax and give up the job of balancing, one needed to grasp a handrail. This is indicative of how we instinctively use our arms and hands. Our ankles and feet are the primary balancers of our bodies, but the arms and hands are the next in line. When we cannot use our ankles and feet, we instinctively grab something with our hands. When our ankles and feet are not sufficient to balance us, we add our arms and hands to supplement. When we balance on a narrow walkway, think of how much easier it is to do when there is a rail to hold onto. If there is nothing to hold onto, we instinctively throw our arms and hands out perpendicular to our bodies for extra balance. Our arms and hands are our second line of defense for balancing ourselves. In some situations, they become the primary means of balance. Our bodies know that our hands can have a much more secure grip on something than our feet. In a precarious situation, such as someone on a tree limb high above the ground, this powerful instinct can completely take over. One often hears of someone in this situation who has simply frozen; they literally CANNOT make their hands let go of what they are holding onto. Instinct has locked the hands’ grip. How often have we seen riders hanging onto the mane or the saddle, completely unable to let go, as instinct takes over and forces them to use their hands to stay on? Many of us have experienced this “lock up” ourselves.

The Rider’s Hands and Arms

Good hand position in nearly all disciplines is usually described as the hands being below the rider’s waist and just a few inches above the horse’s withers. The hands should be in front of the saddle, more or less over top of the horse’s shoulders. Holding the hands in this general area gives the rider the greatest degree of balance. Moving the hands too far forward will unbalance the rider by making him fall forward, and bringing the hands too close to the rider’s body will unbalance the rider by making him fall backwards. Holding the hands too high can encourage using the arms and hands as balancing poles.

In English disciplines, and with inexperienced horses of any discipline, having the hands in this general area allows the bit to work most effectively and gives a straight line from the bit to the rider’s elbow. The straight line from bit to elbow allows the rider to easily feel the horse’s mouth with just a squeeze of the fingers and allows the rider to maintain a light, steady, gentle contact without being pushed or pulled off balance. The thumbs should be on top to keep the wrists straight. Allowing the thumbs to drop towards each other or away from each other will move the reins enough so that many sensitive horses will feel this as a signal and become confused. This also allows the rider’s wrists to bend which will reduce the rider’s sensitivity to how the horse’s mouth feels.

Because of the conformation and way of going of the horses used for Hunt Seat, Dressage, and Western, this straight line is created with the hands hovering just a few inches above the horse’s shoulders. The exception to this is Saddle Seat riding, and in this discipline, the hands are carried a bit higher than is acceptable in Hunt Seat, Dressage, or Western due to the conformation and way of going of the breeds used in Saddle Seat. Gaited horses and breeds typically found in Saddle Seat riding have a naturally higher head carriage and longer neck than other breeds. The gaited horse’s way of traveling requires some modification in the rider’s hand position.

The rider’s arms must be supple and relaxed which is not at all to mean floppy or weak, however. The arms must be under control and ready to work, and yet, at the same time, be soft and elastic enough to be sympathetic to the horse’s natural motion so as to not jar the mouth. The rider’s hands need to be independent of the rest of the rider’s body and under the complete control of rider’s mind. The hands must learn to be more in tune with the rider’s desires as pertains to the horse than to the rider’s instinctive, everyday habits of usage. Not only do the hands need to be in tune with the rider’s concentration of the horse, but they must also be in tune to the horse itself. Here is an image that I have found to be useful……think of the reins as a telephone line. On the each end is a transmitter/receiver, one being the horse’s mouth and one being the rider’s hands. Each of these transmitters/receivers have a base of support; the horse’s being his head and neck and the rider’s being his arms. Problems in these “support bases” can disrupt the transmitters/receivers and cause static and interference in the lines. When either the horse’s jaw, head or neck is stiff and resistant, or the rider’s fingers and arms are stiff and tense and/or bouncy and jerky, then the other receiver encounters interference and the message is lost in static. When this happens, it is the rider’s responsibility, not the horse’s, to clear the lines and restore communication.

The Problem

What this all means is that when we are sitting on the back of a horse, holding the reins in our hands, our instincts tell us to USE those hands to accomplish our objective, whether that is it turn the horse or stop the horse, or balance the horse, etc. On top of that, we are simultaneously trying to not balance ourselves by using our feet and ankles, having been told that this is a cause of stiffness and tension.  All this instinctively causes us to want to use our hands to balance ourselves and use our hands to control the horse. Instinct is a powerful thing, habit is a powerful thing, and we have two areas here of instinct and habit working. What often results is a combination of the rider wanting to over-use his hands to control the horse while also wanting to “hang on” to the reins for balance.

Unfortunately, a horse’s mouth is one of the most sensitive parts of it’s body. A bit in that mouth can cause pain very easily. Forceful use of the reins most often results in a horse becoming uncomfortable and confused and resistant. Nobody wants to be yanked around by a piece of metal in their mouth! Often, the more the horse resists, the more we try to use our hands and arms to fix things and to force the horse to do what we want. Using our arms and hands to fix a problem or to accomplish our goals is so natural for the rider that they often don’t even realize this very thing is the cause of the argument in the first place. They become more and more aggressive with the use of the arms and hands, thus compounding and continuing the problem! Many riders simply have never been taught that true communication with a horse when they are in the saddle comes from a complex integration and coordination of aids involving the rider’s entire body, of which the hands are only one element. Try communicating your desires to another person using only one word. You won’t get far, I’ll warrant. It takes many words, all working together, to allow true communication!

Using the arms and hands for balance results in hands and arms floating up in the air, constantly banging the horse in the mouth as the rider loses and catches his balance. The rider will also lose control of the horse when hanging onto the reins like this because of that “locking” instinct I mentioned above. When the rider feels precarious enough, the hands will lock in place on the reins. As the horse becomes tense or excited or when the horse moves into a faster gait, it will raise it’s head, which brings it closer to the rider. This creates slack in the reins, and when the rider’s hands are locked in place, the rider will not be able to gather up the reins to maintain contact with the bit. The reins will flap loose, or the rider will draw back the arms to the limit of their motion. Once this limit is reached and if there is still no contact with the bit, the horse may not stop: it may, in fact, pick up speed, making matters worse. Unfortunately, at this point, the instinct to lock the hands has taken over and the rider is no longer capable of adjusting the length of the reins.

In all fairness, though, hanging onto the reins for balance is not entirely the fault of the hands. Remember that the hands really only come into play as balance mechanisms when we are struggling for balance. Therefore, it is often the case that floating hands and grabbing and hanging onto the reins for balance is a result of a problem somewhere else.

The Fix

I’ve left discussing the arms and hands until last because I firmly believe that a rider will never be able to develop good hands if the rest of the body is not right. If the rider is still having issues with the heels coming up and the ankles being tense, then there will be problems with the hands and arms. If the rider is having issues with the lower spine flexing adequately, there will be problems with the hands and arms. If the shoulders are tense and rigid, there will be problems with the hands and arms. The only way to attain good hands is to make sure that all the other body components are correct. When the rest of the rider’s body is relaxed and in tune with the horse’s movement and motion, then and only then, will the rider be able to focus on feeling the horse’s mouth and fine tuning the hands’ signals and reactions.

Unlike many other of the rider’s body parts, there really are no useful exercises to help one develop better hands. The rein aids, in all their infinite shadings and degrees of control, are the most sophisticated of all the aids. These infinite nuances can only be learned through feel and experience. Of course, good hands and educated hands also require the support of the seat, legs and rider’s balance at all times, so these other elements must be in complete harmony with the horse, leaving the hands free and independent. It is this independence that allows the rider’s hands to respond, signal, and counteract in the most minute manner possible. It is only when the hands are independent of the rest of the body that they can truly coordinate with the other aids used in riding. If they are not independent, they will always be out of sync with the other aids, and their timing, so vital to the horse’s learning and understanding, will be lost

Riding many different horses with different attitudes and mouths and varieties of problems and their relation to the horse’s carriage and balance problems in general is the only way to develop truly educated hands. As we all know, habit is a very difficult thing to change, and when one rides only one horse, or rides only one style, the hands can become set in the way that works best for that one particular situation. Educated hands take their cues from each individual horse and each individual moment. They can adjust and produce the correct signal or response instantly without jerking or loosing any smoothness or suppleness. All of this is years in the making and requires countless hours on many different horses in many different situations. There are no shortcuts or quick fixes to attaining good or, ideally, educated hands. The only exercise is to spend many years riding a variety of horses and styles

For this reason, I counsel my students to not be frustrated or upset when their hands seem to have a mind of their own. Invariably, out-of-control hands, or stiff, tense hands and arms is a symptom of a problem elsewhere and the true cause must be discovered. It’s my opinion that the lack of “sympathetic following” motion and fluidity in the cues is more a problem of general tenseness, nervousness and inability to mentally separate the hands from the rest of the body and the root cause of these things generally are to be found in the other parts of the body.  Quite often the problem is more of a mental one, as the rider simply does not realize that they’ve “set” their hands and arms and mentally forgotten about them!  Making a conscious effort to soften the arms and to keep the joints supple and flexible despite how much strength they need to maintain (think of how bungee cords work) will correct this.

I believe that the only true hand/arm problem is aggression, or over-use of the reins.  Once a rider fully understands how easy it is to become too demanding and too aggressive with their hands it generally doesn’t take long to overcome this problem. Once a rider understands that they cannot force a horse to do something through excessive use of the reins, the overly aggressive use of reins is halfway solved. 

When the rider has his body in harmony with the horse with all his body parts correctly doing their job, so as to allow his hands to be independent of the demands of his own instincts, when he understands that using his hands is just one small part of his vocabulary, then he is well on his way to developing good hands.

When a rider’s hands have the experience and knowledge that comes from many hours of feeling and experiencing many different horses and situations and can act and react instantly with subtlety and smoothness and sympathy according to the horse’s temperament, when they can maintain their smooth and elastic and quiet communication regardless of what the rider’s or horse’s body is doing, then he is well on his way to developing educated hands.