Training For The Trail
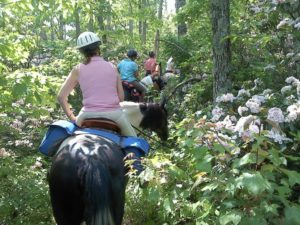 Trail riding can be great fun, and it can help with problems such as boredom and sourness in the ring. The benefits of trail riding can be an increased bond and greater trust between horse and rider, it can help a ring sour horse become more willing, it can help get a sluggish, lazy horse more forward. Trail riding can help teach a horse balance and agility and builds strength and stamina. However, one can’t just take any horse out on the trail, particularly if the horse has been used to a ring all it’s life. Taking an unprepared horse or rider out for an afternoon trail ride can not only be unpleasant and frustrating, but can easily become frightening and lead to disaster. In this article, I will tell you about the things I’ve found to be important for a horse and rider to know when wanting to get into trail riding that involves more than just a hour’s walk around the local fields.
In my more than 35 years of trail riding, my horse and I have covered a wide variety of terrain in all types of weather. We’ve been caught at the top of mountains in lightning storms, been struck indirectly by lightning, we have fallen off of a cliff, been caught in a quagmire, fell through seeming solid ground to an underground creek, gotten lost numerous times, had equipment breakage, episodes of companion’s horses tying-up on the trail. Once a friend and I had to race for help when one of our group fell off of her horse during a gallop and was seriously injured (that situation ended with a helicopter coming to take her to the nearest hospital), several times I’ve had to lead horses home when the rider was incapacitated, doctored horses injuries on the trail, as well as many more minor situations too numerous to list. From my experience, I hope to help other people and horses be prepared for this challenging and exciting activity. Because in my opinion there is nothing more physically and mentally demanding than a serious trail ride, nor an equine activity that is has more chances for encountering surprises. The situation is ever-changing, there is no constant. If you are looking to add spice to your riding, if you are bored with what you have been doing, trail riding may be just what you and your horse need. However, as I’ve mentioned, trail riding has it’s dangers. There will always be an element of risk to trail riding, so it’s best to be as prepared as possible. Being properly prepared will give you the confidence to go out and have a fun, relaxing ride, the confidence to tackle mountains and rivers; challenging horse and rider’s mental and physical fitness.
One thing I want to clarify, before I go any further, is that for the purposes of this article, I am assuming that the horse and the rider at least have a solid foundation of basic training. If a horse is going to start training for the trail, he should be very well-grounded in the principles of moving forward freely and energetically and accepting contact with the bit, has quiet balanced transitions and is rhythmic and relaxed at all gaits. In other words, the horse should should be at a level of training where the rider can apply the basic aids and the horse is willing and able to respond.
Keep in mind, that there are many ways to teach a horse a skill. I am only going to discuss what has worked best in my experience, and what instructions I give will be very basic outlines.
Mounted Skills
 There are several maneuvers that a horse and rider should know and be able to perform without confusion or resistance. Nothing will shake a rider’s confidence quicker on a trail than not being able to control their horse properly. By this, I don’t mean that the horse is is uncontrollable, or that the rider is overmounted, but that the rider realizes what the horse needs to do, how the horse needs to move to get out of a potentially dangerous situation, yet also realizes they they themselves have no idea how to ask a horse for this movement nor does the horse know the cues. The situation does not even need to be particularly scary, either. If enough small problems, struggles, and frustrations occur, if the rider (or the horse) is constantly feeling unsure of themselves, confused, and feel as if they are not communicating with each other, they both can become discouraged about trail riding in general.
Neck Reining
Neck reining is something that is very handy for your horse to know. It’s not critical, but it sure can make things easier. Many times, if the trail is overgrown, I’ve pushed branches out of the way while maneuvering around large rocks or fallen trees or saplings growing in the trail. Often, we will use small, hand-held nippers to clear overhanging branches out of the way as we ride down an old trail. Neck reining allows us to clip as we walk. I’ve had to sometimes lead someone’s horse and neck reining is invaluable to maintaining control. There are also many little instances, such as drinking from your water bottle, or looking at a map, a GPS, or a compass. It’s not difficult to train a horse for basic neck reining. All one needs is a fence or building.
Walk the horse alongside the fence, staying several feet away from it. With the rein closest to the fence, ask the horse to start turning into the fence. Make sure that you use your weight, seat, legs and eyes properly when you pick up the rein. It’s really these aids that will help neck reining make sense to your horse. As the horse begins to turn into the fence, and you feel him set back on his haunches, use your outside leg to keep him activated and as he moves into the fence, release the direct rein and lay the outside rein on his neck. Push him firmly through the turn with your leg. Look in the new direction. At this point, the fence helps to finish the turn and keeps him bending, so releasing the inside rein won’t result in him straightening out. Make sure you release the direct rein as soon as he is committed to the turn and apply the neck rein for the rest of the turn. This way, the horse learns to listen to the neck rein, and not continue to depend on the direct rein. I will work back and forth along a specific section of the fence, always asking for the turns at roughly the same spot. Soon, the horse will start to anticipate turning into the fence as he approaches that area. It will become easier and easier to start your turn with the neck rein. Lightly bump the inside direct rein as needed to help bend the horse in the desired direction, but drop the contact the instant he gives to that direction. Keep the neck rein steady. Basically, you want the direct rein to become just a back up to the neck rein; eventually, it will not be needed.
Backing
I can’t say how many countless times I’ve been thankful for a horse that knows how to back quietly and will steer while backing. Some of the situations could have become nasty had my horse not been willing and quiet when I asked him to back out of something. Unfortunately, very few horses actually know how to back correctly under saddle.
Backing is best taught from the ground first. With the horse bridled, stand facing the horse, holding the reins in one hand. Take up some contact with the horse’s mouth and at the same time, lightly push on the horse’s chest. Give a cluck or tell the horse to “back.” When he takes just one step, praise him and walk forward for a moment. Stop and try it again. Your horse should back by relaxing his jaw, softening his neck and stepping backwards with a regular, even, confident step. Work on the ground until he will easily back correctly. From the saddle, the cues are to sit with your spine “braced” (this discourages forward movement), take up contact, then ask for movement with your legs. If you feel your horse rock forward as if to take a step forward, close your fingers on the reins. Do not, however, pull backwards on the reins. This only creates pain at the horse’s mouth and results in tension and resistance. One cannot “pull” their horse backwards. The horse moves backwards because the rider’s legs ask for movement, yet the spine and hands prevent him from going forward. The only direction left to him is backwards. The energy for a movement always comes from the rider’s legs, never the reins. For many, it’s very helpful to have a ground helper for the first try from the saddle. Have the helper stand in front of the horse, facing the horse, and push on the horse’s chest. Very quickly, the horse will learn the cues from the saddle. I suggest having a helper until your horse will back correctly and quietly. When the horse will back well in a straight line, then begin working on backing while changing directions. Poles on the ground to maneuver through, as well as barrels to back around are helpful.
Other Handy Mounted Skills
Leg yielding, sidepassing, turning on the haunches, and turning on the forehand are also very good things for the horse to know. When the horse moves too close to trees or holes or you need to pass something over to another rider, a sidepass (or even a leg yield) makes it easier to move the horse as needed. Many times, I’ve rode with friends who’ve had their knees banged up because the horse does not know how to move over sideways. Working your way through brush, avoiding roots, trash, and holes are all easier with a horse you can maneuver with your legs. The turns on the haunches and forehand are nice for doing an about face on narrow trails and moving through gates.
Turn on the Forehand
The turn on the forehand is the easiest one to start with. Begin on the ground. With the rein closest to you, gently tilt the horse’s nose toward you. While holding the rein, use your other hand to press on the horse’s ribcage, asking the horse to move his hips over. Work on this until the horse will cross the back legs over without moving forward. From the saddle, the aids are: Outside leg (the one toward which the horse will be moving INTO) is slightly away from the horse’s side, rider’s weight is heavier on the outside seatbone, outside rein is simply light contact (ready to stop forward motion, if needed), inside leg should be moved back a couple of inches toward the haunches, and is active (pushing) at the ribs, inside rein is keeping the horse slightly flexed around the inside leg. In the beginning, ask for only one or two correct steps, stop and praise. Walk around for a minute, then stop and ask for the turn on the forehand again. Eventually, build up to being able to pivot the horse 180 degrees.
Leg Yielding
From this, you can start to teach the leg yield. The objective of a leg-yield is to have the horse cross his legs over and go sideways while also walking forward. A very handy thing for avoiding obstacles on the ground or at the rider’s head level. Also handy for passing snacks from rider to rider. Ask the horse for a nice, forward walk. As he is walking, shift your weight into the direction you want him to go. Lets say we
want the horse to go to the right. The rider should sit heavier on the right seatbone, the right leg should be slightly away from the horse’s ribs, the rider’s left leg should be pushing firmly on the horse’s ribs, a little behind the girth. The right rein should have contact with the horse’s mouth and be opened into the direction of movement to “lead” him in that direction. The left rein should be gently flexing the horse’s nose to the LEFT, and holding the flex, with the rein brought close to the horse’s shoulder. This is called an indirect rein and encourages the shoulders to move over. An example of when a rider would use a leg-yield would be when the rider notices that their knee is in imminent danger of connecting with a tree. If you pick up the opposite rein and pull the horse’s head or even neck rein the horse away from the tree, the horse may turn (or not!) but in doing so, creating a turn/bend away from a tree bends the horse’s ribcage (thus your knee) INTO the tree as you pass by it. Leg-yielding away, however, moves the ribcage (thus your knee) AWAY from the tree. The horse will also be more willing to leg-yield over because it will not be turning his head away from following the horse in front of him.
Sidepassing
Sidepassing is similar to leg-yielding, in that the horse will cross the legs over, but when a horse is sidepassing, he will only be going sideways, without forward motion. Once a horse knows how to leg-yield, teaching a sidepass won’t take long. Use a fence rail or the side of a building. Stand the horse short distance off, and ask for a leg yield. As the horse approaches the fence, keep applying the leg and weight that asks for sideways movement, but allow the horse to straighten up. As the horse gets close to the fence, gently prevent him from turning. Keep him facing the fence by holding the reins wide apart. As the horse shortens his steps, keep your active leg pushing firmly while you maintain equal contact with both reins. When the horse moves sideways more than he moves forward, praise him and allow him to turn and walk off. Come back in a minute to try again. When training for both the leg-yielding and the sidepassing only ask for a few steps at a time, slowly build up to more, and always make sure you work in both directions.
Unmounted Skills
Now, what happens when you have to get off of your horse while on a trail ride? No matter how easy the ride, there will probably come a time when you need to dismount to fix something, even if it is just to tighten your saddle. Many things can require you to get off of the horse while out on a trail. You and your horse must be able to work together on the ground as well as when mounted. Here are two skills that are often overlooked when people are training for the trail.
Standing Quietly and Patiently
Often, when dismounting on a trail ride, there is no adequate place to tie the horse to. One of the most common reasons people need to dismount will be to examine the trail or obstacle in front of the horse to make sure it is safe to cross. Sometimes, you may need to clear things off the trail. A horse that jigs and dances and won’t stand still in line while someone else gets down is dangerous, particularly if there is not much room on the trail. One’s horse should stand still, quietly and patiently, when the ride has to stop for some reason. If you are the one that needs to get down, you don’t want your horse to fussing and fidgeting, either when someone is holding his reins/rope or if you have to tie him. You may not have much room to mount or dismount, and a horse that moves at the wrong moment during a mount or dismount can cause you to fall. You may need a rock or stump to help you mount, and a horse that stands still where you tell him to will make things much easier. If your horse gets his legs caught in something, being able to cue him to stand still may prevent serious injury while you free him. There are several ways to teach the horse to stand still on command. I will give you the technique that has worked best for me with any horse I’ve taught.
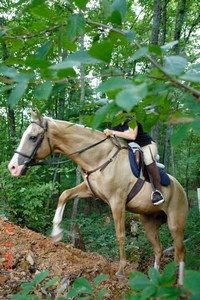 Get a longe line, and some treats, and go somewhere where you both can concentrate. Stand your horse in one spot, and come up with a specific cue to mean that you want him to stay still. I usually use the word “stand” at the same time I jiggle the line attached to the halter. Take one step back and pay close attention to the horse. The objective here it that the horse is not allowed to shift his feet. As soon as he takes a step towards you (or away, or whatever), tell him a sharp “no,” and give a jerk on the line, and move his foot back to the same spot. It he moves two steps, then move him back two steps to the same spot. Now here is where timing is critical. When he has stood for a SHORT time past his usual standing time, then reward him, and take him for a short walk. After a minute, stop, and set him up again, and give him the “stand still” cue, and take a step back again. Do this ad nauseum until over time, you can step back farther and farther, and he is standing for longer periods. With a longe line, you can get quite far yet still have control if he should start to leave. When he is doing well in your practice area, and this may take several days, then take him somewhere more distracting and do it again. My horse will now stand out in my yard with all that grass around him, while I go into the house to answer the phone, and not move. I can tack him up anywhere without needing to tie him, and have left him standing on the trail to move brush. He stands in a trailer quietly, and most importantly, he will stand like a rock while I put him anywhere to mount. I have mounted off of car bumpers, rocks, stumps, fences, fallen trees, anything that is available. I have told him to stand and have removed vines and hidden old wire fence that has gotten wrapped around his legs. So you can see, the ability to stand on command is very important. It’s not hard, just time consuming, and you have to be CONSISTENT with expecting him to stand every time, without moving one foot. If you allow one foot to move before you say so, he will not grasp the concept.
Leading Out on the Trail
Quite likely, however, at some point you will also need to dismount to lead your horse over something. Even nice, easy trails can have a tree fall across them, causing you to have to work your way around it. In some cases you may need to dismount to get past or over something. There have been times I’ve had to dismount and lead to cross very rocky ground or go down a hill that was slippery. Your saddle may slip and you find you are not at a place where you can stop and fix it and so must lead the horse to a better spot. Many times, I’ve seen people need to lead a horse over something, yet they have a very difficult time doing so. You see, leading a horse over an obstacle is very different than leading your horse in from the pasture. When you train a horse to lead under most circumstances, you want the horse to walk at your shoulder. You want the horse to walk when you walk, and stop when you stop. If you move to one side or the other, the horse should turn with you. When leading over obstacles, though, this could be dangerous. If the horse is too close to you and you lose your footing you may get stepped on. If the horse stumbles or starts to slide going down a hill, and he is directly behind you, you may get trampled. Most importantly, however, when a horse needs to (or you suspect he might) jump something to get across it, it is imperative that you be out of the way when the horse jumps. This requires the horse to stand and wait for a cue to move forward, allowing time for you to get across the obstacle and out of the way.
There will be times that you will want the horse to be able to walk directly behind you, such as when the trail is narrow, or far out to the side, away from you, such as when going down a hill. Therefore, it is very important to spend time teaching the horse how to lead and how to move according to his proximity and placement to you. Let me give you some examples of what I mean.
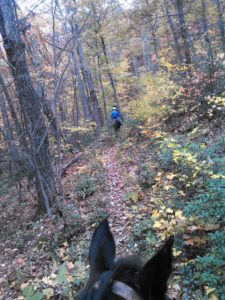
If I place my horse directly behind my back, as I would need to do when leading him down a narrow trail, he will walk when I walk, slow down when I slow down, pause when I pause. I don’t have to look back, and there have been times when I have even left the reins tied to the saddle. I have taught him to play “follow the leader” when he is placed directly behind me. Now, when I place him out to the side, as he needs to be when we are negotiating a steep hill, he also knows to move as fast or as slow, or to stop altogether to stay right beside me. The difference is that he knows to stay off to the side and pick his own way. He only needs to keep his head even or slightly behind my shoulder. For crossing obstacles, I give him the “stand still” cue, then with a sufficiently long lead, I cross whatever I need to, while he waits. Then with a cluck and a tug, I cue him that it is now his turn to cross.
None of this is difficult to teach, it simply takes time. Work with the horse in an enclosed area to begin with. Use brush, tarps, poles, etc. to lead across. I’ve used ramps, see-saws, and bridges that we’ve built for this purpose. I’ve also hung up tarps and strips of plastic, hung either horizontally or vertically, and led the horse through and under them. Practice until you and the horse can do these things without needing a leadline attached to the horse. Some extra benefits to this training is that it’s a great way to build a very strong bond and a very high level of trust between you and your horse. Trust and respect between horse and rider is probably the most critical element to having a good trail experience.
It will also help with issues such as trailering and poor leading/ground manners. For many people, being able to get their horse onto a trailer and hauling the horse out to the country is the only way they would be able to attend a trail ride. If a horse will trust you and follow you anywhere, he will follow you up into a trailer.
Trail riding is great fun for horse and rider if both are prepared. I hope this article has helped give people ideas and tips on what training they may need to focus on to improve their overall level of confidence and joy on the trail.
