My Horse Rushes Jumps

Question: 

My very green hackney pony is learning to jump – and he is really talented! Has a great eye and picks up his little knees great! When working on the flat, he’s calm and focused, however, our problem is this: when jumping, he is a maniac! He is so full of spunk and pep that he wont slow down to the fences. He always finds a nice spot, but then he races through the corners and puts his head down, shaking it and trying to buck! I can usually kick him forward to prevent the bucking, but that just increases his speed! How do I slow him down in the lines and around the corners?

Do you have exercises or tips to help me?

Answer:

First, you want to make sure there are not health or pain issues, such as a sore back, ill-fitting tack, or sore hocks.  Next, you want to make sure his flat work is quite good and he understands rein aids, leg aids, seat aids and weight aids.  Spending time on flat work is often the solution, as sometimes the green horse is still unclear or confused about some of the aids.  Next, make sure you are not anticipating the jump (and subsequent misbehavior) by tightening up your body (ie, reins and legs and stiffening through the spine) and tilting forward onto the pubic bone and “perching.”  Both of these things will cause your horse, especially the green horse, to spurt forward and subsequently lose balance on the other side of the jump, causing anxiety and loss of confidence.

That being said, for the purposes of this question, we will assume you have attended to the above concerns and still need help, as indicated by your question.  If you have not, you will want to get a good instructor to evaluate what you may be doing to inadvertently create some of this behavior.

Very often when this situation occurs, the horse is feeling a bit unsure or nervous or excited.  Whether it is anxiety or excitement, the fix is often the same.  One thing to try is to set up three ground poles both before and after a small crossrail jump. Trot the ground poles on the approach side, go over the jump, then trot the ground poles on the landing side. Set up the ground poles so that the horse crosses a pole on every stride, leaving one “free” trot stride directly before and directly after the jump. When this is going well, then gradually remove one pole at a time (starting with the pole the farthest away) in front of the jump till they are all gone. If the horse continues to jump quietly, then gradually remove the poles one stride at a time (again starting with the pole the farthest away) that are after the jump. If the horse starts rushing again, the put the poles back. When the horse is trotting the jumps calmly and quietly without any poles, then set up two ground poles at canter stride distances both before and after the jump, again leaving one “blank” stride both before and after the jump. Use the same process of removal as when trotting the poles. One other thing I will often do at frequent intervals with both the trotting and the canter phases is to firmly ask the horse to come to a complete stop as soon as possible after the last pole. Not every time, but frequently.

As the horse gets more experience jumping and is ready to move on, I suggest setting up some small crossrails on a bending line. A favorite of mine for this type of situation is to work up to three jumps on a circle, and to ride the pattern two times (jumping all three jumps twice) before stopping. Determine a large circle in your arena and set one jump on the circle. Before and after the jump, work very specifically on the flatwork of the circle, being quite picky about rhythm, balance, roundness and bend.  In other words, place more importance on the circle, and less on the small obstacle that happens to also be on that circle.  Once that is going well, add another small crossrail directly opposite of the first one.   Eventually, add a third jump in between the first two jumps, also on the circle. In other words, set the first jump, then one quarter of a circle away, set another jump, then one quarter away set a third jump. One half of your circle will, in effect, have three jumps, while the other half of the circle will have no jumps. In order to be able to jump correctly, with rhythm and arriving at the correct take-off spot for each jump, the horse must stay on the exact path of the circle and it must also maintain a steady rhythm, not only between the jumps, but also on the side of the circle without jumps. The two halves of the circle must be exactly the same for the horse to arrive correctly for the “first” jump when coming around for the second time. Most horses that are simply jumping too enthusiastically also like to jump well. This exercise must be performed in a very exact manner, and if the horse isn’t paying attention to the rider’s directions, the jumps will be very awkward. Jumping on a bending line is going to, by necessity, make the horse slow down in order to keep it’s balance. Jumping on a circle does not allow a horse to get up a head of steam like it can when it is straight. When the horse can do the crossrails on a circle consistently well, then raise them up and/or vary the heights of each jump a little.

Another exercise I like is setting up a gymnastic line, keeping the jumps as crossrails or verticals of no more than 2’3″. One gymnastic line that I like for this situation is to have the first two elements set as a bounce, using crossrails, then the third element one stride later as a small vertical, then the fourth element two rather short strides, with one stride to the last element. The last jump should be the highest jump of the line. You can vary the height of the jumps (though you should keep the bounce as crossrails), as the horse gets proficient, and you can decorate the jumps, or begin to alter the striding in between the jumps.

With particularly cocky or overly-enthusiastic horses, I’ve even combined the two exercises. I will start with a gymnastic line as described above down the long side of the arena, having the last element just one stride before the corner, bend through the corner, over a jump set in the center of the short side, bend through the corner, to a final jump set one stride after the corner. Using a series of jumps this way forces a horse to slow down and think and forces a horse to concentrate to stay balanced, all of which teaches the horse to wait for and listen to the rider’s instructions.  The point you want to keep in mind is that the horse needs to use his mind and be attentive to the aids to make the jumps comfortable.

When doing these types of exercises, it’s always a good idea to keep the jumps low. Remember, the objective is to show the horse that he needs to slow down and pay attention, not to cause a crash or wreck it’s confidence.

Pulling When Going Home

Question:

We have a somewhat green mare who is doing very well learning to trail ride.  Until we start to come back and we get to near her field. Then she is a major pain…constantly pulling, not responding to the bit…I have been doing circles with her, but  yesterday she was really pulling hard on the bit and I nearly lost control.  Any suggestions?


Answer

What your mare is doing is very common, and also very difficult to fix. Not that it’s difficult to DO, but that it is is very time-consuming. The first thing you want to make sure is that your mare knows how to give to the bit. Both laterally and vertically. Practice that until all you need to do is squeeze your fingers and she softens and gives in that direction. You will also need to make sure she understands how to move laterally off of the rider’s leg. Practice this until all it takes is a bit of shift in the rider’s weight (for example, to the right) and a gentle squeeze of the left leg to get her to step her hindquarters to the right. Practice this in both directions until she is soft and responsive.

Then, when she is pulling to go home, don’t pull back with both reins, you must disengage the hindquarters, which is where her “pull” is coming from. She is, in reality, pushing from her hindquarters into your hands.

You disengage the hindquarters by asking for her to move her hips over with your leg and by asking her to give to the bit (by tilting her nose) in the opposite direction. You can go back and forth between both directions. Do this EVERY time she pulls on you, even a small bit.

If this is not sufficient, then you will need to simply stop continuing towards her “home” and start doing a bit of schooling right there where she is, so make sure that when you are working on this problem, you pick areas that give you some room to work. Now, I want to be clear, here.  You do not want to simply “stop going home” without a plan, that will just make a horse more agitated.  Rather, focus on true schooling.  Begin schooling circles, figure eights, moving the haunches, backing, etc, and really, truly focus on the movements, on getting them correct. For example, on a circle, focus that the circle is truly round, and that your mare is straight on the circle (bending through the body so that her spine matches the bend of the circle and the imaginary line of the circle runs between her left legs and right legs), make sure that both halves of the figure eight are the same and that she does a smooth change of bend in the middle, and so on. DON’T focus on “keeping her from going home” but DO focus on getting the exercise correct. In other words, give her a job to do……..give her something very definite to think about BESIDES going home. Take your time and expect to be there for a bit. 😉

When she is listening, you can calmly start going towards home again, and as soon as she starts pulling, begin again with disengaging the haunches a few times, and if needed, proceed into stopping right where you are and schooling figures again.

Eventually she will realize that every time she goes against her proper training and starts pulling against the bit, she will have to stop and have a “re-training” session. As long as she is listening to the bit, she can continue on towards home.

Once you do get home, DO NOT put her away right away, but take time to do more schooling. Even get off, take a break (without unsaddling) and then do some schooling or go back out again. Make some of your rides be something like this:  go out for ten minutes, come home, go back out for ten minutes, come home, go back out, etc., so that she does not think that if she can just get you home, you will get off and put her away. In other words, take away the anticipation of “going home.” 😉 Make her go back out, or make her do some schooling when she does get back.  A great technique is to have her work harder (serious schooling exercises) while at home, and have the short trail ride be relaxed and enjoyable “time off” (so long as she is behaving).

The trick is to keep yourself thinking about this as a training problem (she is not listening to the rider’s cues) and not a specifically “going home” problem………that way, you will have more of the mindset of “how can I get her to listen to me better in all situations” rather than “how can I keep her from dragging me home.” The first way of thinking encourages you and her to work together, the latter way encourages you and her to fight over something. Because the bottom line is that she is not listening to you in all situations………and if you allow her to disregard you in one situation, she will do so in more and more situations, anytime the situation does not “suit” her. It will escalate.

Basically, there is no quick fix to this problem. But it is very common and pretty much every horse will do this to some extent or another at some point. However, if you DON’T get it under control, it can very quickly become dangerous.

Snaffle Bit

Question:

A trainer I know insists ALL horses be ridden in a snaffle, can ALL horses really perform in one, including older horses who have harder mouths, or mouths that can ignore a snaffle?

Answer:

This is a question that, taken at face value, I would have to answer as “yes,” since this question is asking if all horses are CAPABLE of performing in a snaffle. But, perhaps a better way of asking this question would be: “Can ALL RIDERS get all horses to perform well in a snaffle, including older horses who have harder mouths, or mouths that can ignore a snaffle?” Asked this way, the answer would be “no.” Let me elaborate.

ANY horse IS capable of being ridden in a snaffle, PROVIDED the horse has been trained correctly, and the rider is riding correctly. Of these two conditions, the rider’s knowledge and ability is the most critical. A horse is properly controlled by a rider’s seat and legs, NOT the bit and reins. The bit is more correctly used for very fine detail to enhance the control that comes from the seat and legs. Ridden correctly, a horse does not need a bit at all for general riding maneuvers, therefore a “hard mouth” or a horse that has learned to ignore a snaffle are irrelevant. Many people, however, do not understand the correct use of legs, seat, and hands and will use the hands for the majority of their control. This causes tension in the horse, sometimes outright pain, and causes the horse to focus on it’s mouth to the exclusion of all else. This leads to the horse learning evasions and resistance to the bit, causing people to use stronger bits. In many of these cases, it is true that a knowledgeable rider would still be able to ride this type of horse in a snaffle (albeit with some retraining), however, to the less knowledgeable, this same horse would be uncontrollable in a snaffle.

So, in other words, some horses could not perform well, if at all, in a snaffle with some riders. This is not due a HORSE’S inability to ride in a snaffle, but a RIDER’S inability (both past and present) to apply proper use of aids. If all riders rode equally well, then there would not be learned evasions and resistance to the bit, and if, for some reason these did occur, then a rider would have the knowledge to correct the problem, therefore still allowing performance in a snaffle. Since I don’t see this happening any time soon, I think it is the trainer’s, or instructor’s, job to work within the bounds of reality and find a compromise suitable for both the horse and the rider, according to the situation.

On a related side note, some people may try to make the case that the configuration of their horse’s mouth is such that a single jointed snaffle is uncomfortable. This is certainly possible, however, replacing that single jointed snaffle with a double jointed snaffle, such as a french-link will solve this problem.

Proper Trailering Technique

Safely Load and Unload a Horse From a Trailer

Some people are blessed with having trails, riding arenas and activities right where their horses live. For others, to enjoy these things means they will have to trailer their horses to another place. The reasons for trailering are many and can include traveling to horse shows, trail heads, and other pleasure activities. Sometimes, the reasons can be more urgent, such as a natural disaster, fire, or emergency vet care. When one absolutely needs to get a horse into a trailer, being able to load a horse quickly and quietly may be, literally, a life or death situation.

As with any equine activity, there are several different ways to load and unload a horse. Though of course individual horses may be more comfortable with something different, the safest and most convenient way for a single person to load a horse onto a trailer is to essentially have the horse load and unload itself. To load a horse using this technique, the handler stands to one side as the horse walks past them and into the trailer stall. The handler then fastens the butt bar/chain and closes the ramp/doors and walks around to enter the trailer at the horse’s head to tie them up. For unloading, the handler first unties the horse’s head, then walks around to the back of the trailer to drop the ramp or open the doors, undo the butt bar/chain, then steps off to one side, and with a tap on the rump, the horse backs out.

In this way, the handler is never inside the trailer while the horse is moving and is always at the back of the trailer to catch the horse when the horse is not contained inside. This technique also eliminates unnecessary running back and forth from the front to the back of the trailer. It prevents the terrible “fly-back” that occurs when the back of the trailer has been undone yet the horse has not been untied which can cause the horse break a halter or trailer tie and whack the top of it’s head on the trailer roof when he tries to exit before someone can get around to undo the trailer tie. Though the vast majority of horses can be taught to load this way, it does require some preparatory ground work and a patient attitude on the part of the handler. Training for this is an excellent way to gain trust and encourage confidence from the skittish or anxious horse and the training and cues will also be of benefit when one is out on the trails and encounters a situation that causes a horse to balk. It also can be of benefit with the horse that lacks respect for the handler.

Training for this way of loading involves utilizing a behavior common amongst horses. A dominant horse shows dominance, or leadership, in two ways. One way is that they physically lead the herd from place to place. They determine when to go to the water source, and when to move to a different grazing area. Often people don’t notice this behavior as much, since in many domestic pastures, the enclosed space is small enough that the individual horse is comfortable making the trek to the water source, etc, by themselves, and the entire group, therefore, does not need to move together so much since the distance to be traveled is not significant. However, if one pays attention, one will see that it is generally a specific horse that decides when to go to the shelter to get out of the heat of the day, and when to leave the shelter to go back to grazing. My article HERE, utilized this type of leadership dominance. The other way a horse shows dominance and leadership is by “pushing” other horses and making them move out of their way. Most people have noticed this behavior at some time or another. The pushing of other horses is more commonly used for short movements; either moving a horse away from the space they are occupying (generally because that space contains something the dominant horse wants), or moving a horse out of the dominant horse’s personal space for some reason. Because it is used for very short distances and small spaces, it is much more commonly seen in the domestic situation. It is this type of leadership dominance that is utilized for teaching a horse to load itself.

I advocate starting with the “leading” technique that was discussed HERE, in one of my previous articles.  In this way, the handler shows the horse that the handler is a competent and trustworthy leader and that the follower can trust the handler to keep them safe. Once that trust is established, the handler can move on to the “pushing” technique that will build respect and that will ultimately train the horse to walk onto the trailer by itself. The horse will not feel threatened or anxious from this more dominant behavior from the handler if the handler takes the time to first establish the trust relationship. Horses are not afraid of the benevolent dominant horse in the group; only the unknowns and the bullies inspire fear.

As will most specific training issues, preparatory work is very important. Essentially, you are going to teach your horse to move out slightly in past you so that you push the horse in a direction of your choice. You want to be able to “drive” the horse and it move forward from you on cue.

You will need to have a long lead line, 10-15 feet, or a longeline. Start by leading the horse parallel alongside a wall or fence. Step sideways slightly to put the horse between you and the wall/fence. Raise your free hand towards the horse’s hindquarters and step to the rear of the horse while encouraging it with a verbal cue to move forward. Because I want this to be used in specific situations without confusion or hesitation on the horse’s part, I use a voice command, not just a generic “clucking” noise. As the horse moves forward, allow the line to slip through your hand so that the horse can move past you. Keep him going until his hindquarters have gone past you. Practice this a few times in different places along the fence or wall working from both sides of the horse, until the horse understands the concept and moves willingly forward past you. Aim for a relaxed, calm walk forward. Also make sure the horse waits on your “go forward” cue and doesn’t just start moving forward on his own in anticipation. I have seen more than one handler get stepped on when the horse started walking into the trailer before the handler was ready; you may have to pause to gather up a lead line so that you or the horse doesn’t get it wrapped around a leg, or you may see that something in the trailer is not right and needs to be attended to (ALWAYS pause and check the inside of the trailer before sending the horse in…….I once found a wasp nest inside the trailer as I was standing outside of it with the horse waiting–sending a horse in with a wasp nest would have been disastrous!). It is also essential that the horse understands that the only time it is permissible to go past you is when you give a specific cue to do so.

Once you feel he understands the cue, you can then move to using the horse’s stall, or by creating a “stall” with barrels and boards and tarp or whatever you have around. Even hay or straw bales will work. In fact, building a “stall” with bales is a great way to practice for the trailer, it allows you the opportunity to back the horse out of a small space, too. When utilizing a real stall, though, again, don’t just simply let him walk in on his own accord as you might normally do. The idea here is to establish a set of cues, much like a dominant horse does, that you will use consistently to let the horse know that you want him to walk forward. I will walk the horse up to the opening, then stop him and make sure I have his attention. I then fiddle with the rope, or move around a step or two. After a moment, I move off to the side and rear of the horse and give the cue to walk forward. You can use tarps on the ground and ask the horse to walk over it, or past scary umbrellas, or dangly things, but the point is that this time, instead of you going first and him following (as explained HERE), he is expected to move out away from you and past, over, or into the scary thing by himself. The timid or anxious horse will need calm encouragement. Sometimes, just standing and waiting without allowing movement in any other direction except the indicated one works best with this horse if they appear very tense. With the obstinate or stubborn horse, you may need to apply stronger pressure with the end of the line, or a longewhip. But the horse must go forward in the direction you’ve indicated and no where else, so often starting with something very easy (such as moving past you and a fence/wall to open space) or familiar (such as their stall) and progressing to more scary and then more confined is more productive. It will avoid overstressing the sensitive horse and build confidence and will often reinforce your right to push the obstinate horse around and avoid confrontations. And certainly, not every horse will even need to go through all the steps. Horses that are already loading willingly and calmly by following someone up and into a trailer will often have no issues at all with doing it without a leader once they understand the cues, simply because the trailer is not a big deal to them.

Finally, when the horse is ready to start working with the trailer itself, I will generally have some sort of yummy food in there for them to find, even if it is a haybag with some tasty alfalfa in it. Once the horse is in the trailer and happily munching on their reward, I will flip the rope up over their back (when the horse is loading consistently then I will usually flip it up over their back before, or as, they walk on) and do up the butt bar and then ramp/doors, then walk around to the front of the trailer and give them lots of praise while taking off the lead and tying them with a safety trailer tie. After a few minutes, I snap the lead back on, take off the safety trailer tie, flip the lead over their back (making sure that it is near enough to the haunches that I could reach it from behind), and then walk around to the rear of the trailer and undo the back of the trailer. Once you undo the butt bar/chain, make sure you are standing off to the side incase the horse comes off too fast. If you think that your horse might do so, it will be helpful at first to have a helper stand at their head to keep them calm until you are ready to ask them to back out and to help control the speed. To ask him to back out, I will pat the horse on top of the rump lightly and tell him to “come on” or “out” or something of that nature. If he does not come out or appears confused, reach up and get the rope that is laying across his back and give a gentle tug to get him started. I have a ramp trailer, so I usually try to keep one hand on the point of his rump to reassure him that I am there and when he is ready to step off the ramp with the first rear hoof I will apply a bit more pressure and tell him “easy.” If you are consistent with your timing, it will help him know when the step is coming and makes it less worrisome. With a step down trailer, they step down nearly immediately, so giving a second cue for the step is not necessary.

If you don’t own a trailer, borrow one periodically, just to keep you and the horse accustomed to it. Many trailer sales places will have trailers for rent, and I feel that it is a good investment to even rent one once in a while for a few days to practice with. Having a horse load and unload calmly is an essential skill, in my opinion, even if you never plan on trailering. There are always exceptional circumstances that could come up and no one knows what the future may bring. It’s best to be prepared.

Backing Out of a Trailer Problem

Question:

I have a 4 yr. old gelding who I can get into a stock trailer but I can’t get him to back out. When I put just his front feet in I can get him to back out very nicely but when I get him all the way in he won’t back up even if he is at the front of the trailer and backing up won’t get him anywhere near
the edge. He hasn’t been trailered ever as he was born at my place and I’ve never had a trailer. Am I expecting to much of him or not?


Answer:

Hi,

I don’t think that you are expecting too much from this horse at all. Even weanlings can learn to trailer, load and unload quietly. This is not really a trailering issue at all, this is really a trust issue. While your horse may trust you in most areas, in this unfamiliar situation this horse does not trust the ground to be there under him when YOU say that it will be. If you look at it from his point of view, you can understand his fear. If you KNEW that there was a drop-off behind you, and someone, even someone you know, told you that it was okay to step off, yet you could not check to see for yourself but must step backwards blindly and hope that you can make it, would you not be hesitant to proceed? I suggest taking time to teach this horse that he can, in fact, trust you in this sort of situation. You do not need a trailer for this, either. You will need to come up with two distinct cues. One for “follow” and one for “back up.”

First, teach the horse to follow you everywhere you go while leading him forward. Make it a game, give treats (this is a great clicker-training exercise) and lots of praise and teach him to follow with his head at your shoulder through all sorts of obstacles and situations. Over tarps, over ditches, through water, build a bridge and clump up and over it, through hanging strips of plastic garbage bags, past or through any sort of scary object and uneven ground you can think of and/or make.

Next practice a bit making sure that he will back easily on cue. Start on level ground with good footing, and ask that he back a few steps with you. Stand at his head facing his tail and move with him as he backs up. Practice this until he is comfortably and quietly and easily backing on cue for a good distance. Then ask him to back between two poles on the ground. Ask him to back between two barrels. Ask him to back through a pattern of poles so that he has to turn and maneuver. Again, work at this until he can do it easily and quietly. Now, you are ready to put the two skills together.

Start out as you have been and go forwards past or over a scary obstacle or uneven ground. Then stop, and, staying at his head, you begin walking backwards as you use your “back up” cue to ask him to do the same obstacle in reverse. Work up to him backing into shallow ditches and creeks and off small banks. I used to have a house where the back steps from the porch to the driveway were concrete slabs of about 12 feet square. Something like that would be perfect. Stand the horse on a slab and ask him to back so that he steps down to the next one. When he will confidently follow you forwards or backwards over, across, or past anything you ask, then you can use the same technique with the stock railer. Have the same matter-of-fact attitude and use the same cues in the same consistent manner as you have been. Ask him to follow you onto the trailer, then ask him to back off of the trailer. If you want, or feel it may help, back the trailer to a smallish bank or hump in the ground so that the distance he must step up or down is less.  If you’ve taken your time and built his trust in you so that he knows if you ask him to back up somewhere, he CAN do it, even if it seems weird or scary, then the trailer will become a non-issue.

Your First Horse Show!

So you are going to your first horse show. Or maybe it’s just been many years since you’ve been in the show ring. Either way, it can be a nerve-wracking experience just getting there, not to mention the actual event, itself. I have seen the emotions of my students run the gamut from total nonchalance as the young competitors have fun with friends and seem more interested in just walking around with their horse, to one young student who was in the truck throwing up from nervousness. While your inherent temperment will have a lot to do with how big your butterflies are, I’ve found that advance preperation, or lack of it, will really make the entire event an enjoyable one or a disappointing one.

I’m not going to get into any training suggestions, since that should have been taken care of long before the show. What I hope to do is to help you get ready for the show as stress free as possible, be as organized as possible and have as much fun as you can while battling your butterflies.

BEFORE THE SHOW

If you are planning on doing any showing at all, a good thing to have is a copy of your association’s rule book and study it for the rules and requirements for your class. Know what equipment and tack is legal and not legal, and what clothes you are expected to wear. Understand what the judge is looking for during the class and what might be asked of you. All this is in the association’s rule books, and when you know what the judge is looking for in any given class, you are less likely to feel insecure and more likely to feel confident that, at the very least, you are not sticking out like a sore thumb. Two days before the show, spend the lesson, or your practice time, running through a mock class. Recruiting your friends is helpful, but not necessary. Enter the ring as if at the show, and in your head or out loud, call out the commands of the class. Work on getting good transitions, making smooth circles, and moving across the ring as if avoiding a slow group of horses, smiling the entire time. Do these things in all gaits. Practice coming into the center of the ring and lining up, working on as smooth and square a halt as possible. Practice just sitting there with the proper body and rein position with a smile for several minutes. You will be amazed how hard it is to keep a pleasant, smiling look on your face during this time.

The day before the show, don’t practice on what will be required in the show. Go for a trail ride instead. This will relax you and the horse, and will give the horse a much needed break from drilling. He will be less likely to be sour. Practicing the day before the show has a very real possibility of frustrating you and the horse, especially if you are nervous about the upcoming show. Of course you will want everything to be perfect, that’s human nature, and it won’t be, that’s equine nature, so don’t even go there. You will end up more nervous than before you started. If you can’t go out on a trail, then hand graze your horse. After your leisure activity, its time to bath the horse. I usually recommend bathing the horse the night before, unless you are sure you will have plenty of time in the morning. Generally, though, horse shows begin early, and you always have to factor in driving time. Since there is the danger of the horse getting dirty during the night, you will need to put a sheet on him. If you are going to braid or band the mane, then do that the night before also, putting a slinky on over the mane to keep it neat. Spend the evening cleaning your tack (don’t forget to shine the silver or any metal), setting out your show clothes, and packing the truck and trailer. Hay, buckets, first aid kit, tack; anything you don’t need to get dressed with in the morning should be packed the night before. Do as much as possible so that you aren’t rushed in the morning when you are trying to load your horse. I recommend NOT wearing your show clothes to the show, but rather change there after you have the horse unloaded and you’ve checked in. Plan on getting to the show grounds early enough to give yourself plenty of time to unload, check in, and then change before you need to warm up for your first class.

If you come to get him in the morning and he does have stains on him somewhere (most often the stains will be on any white areas), don’t panic. Have some terry-cloth towels ready and soak them with as hot as water as you can, or wet them and put them in the microwave for a minute. Use rubber gloves if you need to to handle them, and wring them out as much as possible, but the towel should be still very warm when you use it. Rub the soiled areas firmly with the towel, shifting to a clean spot on the towel frequently, until the dirt is gone. The moist warmth will lift out even poop stains.

AT THE SHOW

Most walk/trot/canter classes will have the participants enter at a walk and walk on the rail until all those entered for that class are in the ring. At that point, the announcer will tell you something to the effect of “you are now being judged at the walk.” From that moment on, consider yourself in the spotlight. Plaster a smile on your face, relax and be as natural as possible. How long the walk, trot, and canter gaits will be maintained as each are called for will depend on the size of the class. So if there are few participants, expect that you will not be in each gait very long. In this case, you will need to make sure that your transitions are very crisp and clear; in a small class, all are very visible to the judge and a flubbed transition will be noticeable. Small things count, such as making sure that you begin posting on the horse’s first step of the correct diagonal. Make sure you sit back slightly for a balanced downward transition to ensure you don’t fall on the horse’s neck. Smile as naturally as possible and make eye contact with the judge when you can. In a small class, it’s easy to show off your horse’s big, flowing strides in the english divisions or his rythm and cadence in the western divisions without worrying as much about interference from other competitors. So if your horse has a big, free flowing trot, really push him out to show it off. Know your horse’s strong points and weak points. Display yourself in the areas that you know your horse shines, and move more into a group for the ones that your horse doesn’t do as well. In a larger class, the called-for gait will last longer, perhaps several laps of the ring, until the judge has had a chance to look at everyone. Since you don’t know when he will get to you, you must be “on display” the entire time. In a larger class, you must be very diligent about paying attention to the rest of the riders in the ring. Quickly pick out the trouble horses, the ones that seems spooky or overly excited and try to stay away from them. Also pick out the ones that move much slower than your horse, smaller ponies, ect. and be aware of how fast you are approaching them so as to leave yourself time and space to circle or go around or move to the other side of the ring smoothly and in an organized manner, calmly and smoothly avoiding any obstacles in the ring.

No matter the size of the class, a good competitor will be the person that knows his horse’s strong points and weak points. No person or horse is perfect, the trick to competing is to know when to be noticed and know when to be less noticable. Get out into the open if your horse has a great trot. Move closer to a group if you know your horse doesn’t pick up the right hand lead consistantly. A successful competitor knows when to display her horse and when to be “one of the crowd.”

Most shows will call for you to walk, then will ask for a trot/jog, then ask for a canter/lope. After then canter/lope, the announcer will generally ask for everyone to walk, then reverse directions. This is your opportunity to get clear of a pack, spread out and take a deep breath. The judge will be watching that the reverse is done in an organized manner, but do try to use it to spread out. You will, of course, do the same thing, in the same sequence in the new direction. When the judge is satisfied as to his/her placings, the announcer will ask you to come into the middle of the ring and line up. Pay attention to the instructions so you move smartly into place without a lot of wandering around. Again, keep in mind the fussy, nervous, agitated horses and try to stay away from them. At this point you are done and can relax, right? WRONG. While you are standing there, the judge may be making last minute adjustments to his placings. Halt your horse as square as possible, maintain good posture and position, keep the reins at the correct length and smile, until the first ribbon is called. At that point, you are finally able to relax some. If you don’t place, still smile and thank the judge if they are near, thank the ribbon person and the gate person on the way out. Congratulate those that have won a ribbon if you pass them.

If you are in a class with jumps, its helpful to not schedule a class right before your jumping class. This gives you time to go to the postings board and memorize the course and gives your horse a chance for a rest and a drink. You might want to grab a drink now, too. If it’s an option, ask the steward if you may go towards the middle or end of the class. Watching several competitors do the course will help you see any trouble spots in the course and help set the course firmly in your mind.

Be aware of how your classes are scheduled. Don’t do too many in a row, generally two to three flat classes in a row is enough. Both you and your horse will get tired and cranky without a break between classes. Plan a nice long break when you can untack, sponge or hose the horse down, undress youself as much as decently possible and get your horse and yourself something to eat and drink. If its a hot day, offer your horse water every 20-30 minutes, and you should be drinking water (not sodas) often, too.

After you classes are over, hopefully there will be some ribbons hanging on your truck. That is, after all, why you came, isn’t it? Whether or not there are any ribbons in your hand, it’s best to consider these first few shows as a learning experience. One needs to be familiar with all the little details that one learns to do during the show, one needs to be familiar with different judges and what their opinions for judging are, ect, to do well, and things like this simply take time spent at shows. It’s also a great opportunity to expose your horse to different sights and sounds and activities while you are on him, whether or not your horse is a seasoned campaigner, if you’ve never rode him at a show, it’s normal to be nervous and unsure about it. Think of these first few shows as simply another lesson for YOU, if not your horse, too. Use these shows to perfect your organizational skills, your concentration, your ability to think on your feet, all while riding your horse in an unfamiliar setting. You’ll be amazed how hard it is to pay attention to the details of your riding and to insist your horse performs your requests to the best of his ability when you are surrounded by unfamiliar distractions and everyone is staring at you. Looking at it in this perspective, simply getting through the day at the same level of perfomance you achieve at home is a herculean task. If you have some ribbons, that is great, however its far more important to come away from the show with an idea of some things you can improve upon, a sense of accomplishment that you made it through the day without fainting and actually had the courage to get up in front of everyone.

Most importantly in my opinion, I hope you come away from the show with the understanding that, whether you placed well or not, this is only one person’s opinion of how well you and your horse performed within a designated five minutes out of your life. Had it been a different five minutes, you may have done better, or worse. Had it been a different judge, you may have placed better or worse. This is true of all the other competitors, too. Remember that when the butterflies really start fluttering. Within the grand scheme of your life with your horse, that five minutes really isn’t that important. What’s important is that you and your horse develop the communication skills necessary to get to a show at all. What’s important is that you and your horse learn to trust each other to the point that your horse will go past the scary judges-booth monster at something less than the speed of light.

What’s important is that you and your horse had a good time and learned something.


In the table below I’ve included a very comprehensive check list to help you as you pack (not all of the items may be necessary in your situation, but this is a good list to work from):

101 Horsemanship and Equitation Patterns by Cherry Hill.

PAPERWORK CHECKLIST
Original or photocopy of registration papers
Coggins test certification
Health exam certification
Proof of ownership
Amateur or Non-Pro card
Association membership card
Proof of age – youth
Show bill
Rule book
Paper and pencilsTACK
Saddle
Bridle
Martingale
Pad or blanket
Girth or cinch
Lead rope
Protective boots
Tack trunk
Extra halter and lead rope

FIRST AID
Iodine-based antiseptic solution
Triple antibiotic ointment
Non-stick gauze pads
Self-conforming gauze rolls
Stretch bandaging tape
Elastic adhesive tape
Scissors
Cotton or disposable diaper
Chemical ice pack
Liniment
Sunscreen

FOR THE RIDER
Coat or vest
Pants
Chaps
Shirt
Tie or pin
Boots
Spurs
Gloves
Hat, show type
Hat, for sun protection
Hair net
Pins
Comb
Brush
Safety pins
Mirror
Rain gear
Rubber shoes/boots
Nutritious snacks
Water
Folding chairs

HORSE CARE ITEMS
Grain and feed tub
Grain
Hay net
Hay
Water pail
Water, if necessary
Wintergreen, cider vinegar, Jell-O, or Kool-Aid, if needed to flavor water
Electrolyte paste or powder
Manure fork and bucket or basket
Barn broom
Rake
Bedding – shavings or straw
Barn lime
Horse blanket and hood
Sheet or fly net
Fly repellentTACK CARE
Sponges
Cloths
Saddle soap
Polish
Small bucket

GROOMING KIT
Hoof pick
Rubber curry
Dandy brush
Body brush
Rubber mitts
Rub rags
Sponge
Sweat scraper
Bucket
Shampoo
Hose
Corn starch
Baby oil
Hoof sealer
Hoof black
Electric and battery operated clippers
Comb
Hair brush
Yarn and needle for hunter
Rubber Bands or tape
Scissors
Extra tail wrap

MISCELLANEOUS
Plastic bags
Extra cloths

TRAVELING
Traveling blanket
Shipping leg wraps
Tail wrap
Halter and lead rope

Longeline Basics

Longe line work is one of the most basic, and at the same time, one of the most advanced training tools available. It is extremely useful in the early stages of training to condition a horse to carry a rider’s weight, and can be very nearly as important later in the horse’s life when he is more advanced. The purpose of longe line training is to create a horse with an improved way of going that will make it easier for a person to ride him. It can be considered a necessity for schooling and conditioning a horse of any level or discipline.

Some people think that longeing is only good for simple exercise of a horse that can’t be ridden. While it’s usefulness for exercising and schooling a horse that cannot be ridden is obvious, any horse’s movement and way of going can be enhanced by work on the longe line, whether it is capable of being ridden at the time or not. With the proper longeing equipment and technique, advanced training in balance, impulsion, self-carriage, collecting and extending, vertical and lateral flexion and more, is possible. For the purposes of this article, however, I will be focusing on basic longeline techniques, problems that can develop and how to correct them.

As with any training, one needs to have a clear view of what one is trying to achieve, not only in the next thirty days, but each time the horse is longed. There will not be any progress without a clear objective for each session on the line, keeping in mind the most important and fundamental precept in longe line work; the horse must be more relaxed and quiet when the session is over than when the session started.

Also, as with any training, time and care must be taken to accommodate the horse’s level of experience and it’s maturity, both physical and mental.  Longeing can be mentally taxing for for a very young horse, and physcially, can contribute to splints in a horse who’s bones are immature.   It is advised when longeing a young horse (less than three years old) to start with only 15 minutes at a time, even if not much actual circling is done, to allow the young horse time to become accustomed to the mental focus and concentration of the exercise as well as the physical stress.

BASIC POSITION AND EQUIPMENT

Longeing is of no value, indeed, it can be detrimental, if not done correctly. One needs the proper equipment . This is a bridle fitted with a plain snaffle or longeing cavasson, side reins, and a saddle or surcingle, and a longe whip. One also needs to understand how to use the proper equipment. The line should be attached to the bit in such a way as to give the handler the ability to use the line as one would use the reins. Usually, the line is run through the ring of the bit on the side nearest the handler, up and over the poll, and down to clip on the ring of the bit on the side farthest from the handler. (When the horse changes direction, this will need to change sides, also.) When the line is attached this way, it allows the handler a very fine degree of control over the horse’s movements, nearly as much as from the saddle.

While many people will longe a horse with the line attached to a halter, and a great deal of elementary training can be accomplished this way (such as when introducing a young or inexperienced horse to the concept of longeing), no advanced work can be done from the halter. One must also always be aware that in many cases, attaching the line to the halter encourages the horse to “lean” on the line, thus not properly balancing himself. Additionally, attaching the line to the bridle once the horse is ready to be schooled to ride, allows the horse to become accustomed to the action of the bit. The horse learns to accept and give to the bit and can work on the basics of stopping properly without having to contend with the rider’s weight. The horse who is not yet accustomed to carrying weight will find it much easier to understand and execute proper upward and downward transitions without the rider’s weight. There is less likelihood of the horse “leaning” on the bit for the downward transitions.

Hold the excess line coiled loosely in the same hand as the whip. This allows the hand closest to the horse to able to feel the horse and control the horse. The longe whip is to be used as a substitute for the rider’s legs, so one must be proficient in positioning and using the whip. Practice with the line in conjunction with the whip is necessary to avoid fumbling and dropping the equipment, which results in confusing the horse. The handler should be positioned slightly behind the horse’s midpoint so to be facing the horse’s ribcage, with the shoulders slightly opened toward the horse’s shoulders. The handler must be very aware of how his/her body is placed, and what signals they are sending the horse. Stepping toward the horse indicates for the horse to move out further on the circle. Turning the shoulders towards the horse’s rear indicates for the horse to slow down. Raising the whip tells the horse to move faster, holding the whip elevated means to maintain that gait. Dropping the tip of the whip onto the ground tells the horse that it is okay to slow down. In order to keep the horse moving freely in the correct direction, the handler should have their shoulders facing slightly in the direction the horse should be traveling. It’s important to understand that the handler’s position and the whip’s position can reinforce the voice commands or confuse them.

COMMON PROBLEMS

Some common problems are the horse moving in too close to the handler, turning and facing the handler (or trying to turn completely around to the other direction, leaning on sidereins (if used), leaning on the longeline, going too fast or, conversely, not moving enough.

Moving in too close to the handler
When a horse moves in towards the handler, many times the handler will react instinctively and step back away from the horse in order to get out of it’s way or to keep the horse from stepping on the line. Unfortunately, this sends the horse a signal that the handler has assumed a subordinate position, and is allowing the horse to be dominant.

Do not allow the horse to move you around, you are longeing the horse, he is not longeing you. When he moves in off of the outside track, step towards him, pointing the tip of the whip into his his ribcage if you catch the inward movement quickly and only need a step or two back out, or at the shoulder if you need to move him more aggressively to the outside . If needed, flick the whip so that the lash rolls up towards him. Be aware that the horse does not push you out of your spot, rather you push him back to the outside. In order to avoid either you or the horse stepping on the line, you need to practice until you can smoothly gather up the line as you step towards the horse, putting the excess in the whip hand.

Turning and facing the handler
Turning and facing the handler is most often the result of the handler having the incorrect position in regards to the horse. Often, they’ve allowed themselves to move to much towards the front of the horse, or turned their shoulders towards the horse’s rear. This can cause the horse to try to assume the position of being “lead” on a leadline instead of the position of being “driven” around the longeing circle. Another common mistake is to let the horse lose impulsion, this allows the horse to become distracted and lazy, and results in him trying to stop and get out of work.

Make sure you maintain the correct positioning. It’s critical to stop the movement of the horse turning before he actually gets into the turn. It takes practice, concentration, and close observation to detect the initial, small movements of a horse that is losing impulsion, hesitating, looking towards the inside and beginning to pivot. If you catch it early, step towards the horse and roll the lash at his hocks. Then, “drive” the horse around the circle by standing slightly behind the ribcage, holding the whip hand up to create a line pointing slightly behind the haunches, and keeping the longeline hand up to create a line towards the horse’s head and to take a feel of the horse’s mouth. The horse should be positioned in between these two lines. Push the horse up into your hand with the whip, asking the horse to step forward more energetically (at whatever gait) and to bend correctly. If your horse has already begun the pivot, quickly bring your longeline hand up high to block the pivot, while at the same time stepping towards him and pushing him forward with the whip. Done quickly and smoothly, this will surprise the horse and push him into the correct direction before he can argue. Immediately go back to asking him to work.

Some horses, unfortunately, have learned to pivot and face the handler as an evasion. If your horse insists on facing you, and backs away when you try to drive him forward, you must keep walking to follow his haunches. You must keep following the horse, trying to get yourself back into the correct position in relation to his haunches. This may mean that you and the horse will dance around each other for a while. Your horse will most likely try to continue backing away from you to prevent you from getting into the driving position. Calmly, yet stubbornly follow him. Keep the tip of the whip raised, this is the horse’s cue to move forward, for as long as he is going backwards, he is not answering the cue correctly therefore you need to keep cueing until you get the response you are looking for. Continue following the horse, maneuvering to get back into the driving position (the rear half of the horse). Eventually the horse will realize that backing away from you is not making you go away and furthermore, backing up constantly is hard work! At this point the horse will dart forward, sometimes much faster than you would have liked. That’s okay, it’s forward motion, not backwards, and that is, after all, what you were asking for. Immediately drop your shoulders, your whip and your leading hand, give a big sigh and relax and look away. Of course, you may have to maintain a good grip on the line, since the horse may be going to fast, but be as relaxed as possible, and make sure you don’t look directly at the horse for a few minutes until he slows down. Praise him constantly. If you do this without letup until he moves forward, it won’t take but a few times for the horse to come to the conclusion that this evasion is not going to work anymore.

Bolting
Bolting around the circle can be dangerous. If the horse takes off too fast and tries to drag the line out of the handler’s hand, the handler should immediately drop the longewhip in order to be able to use both hands. Allow the line to slowly feed through the hands while walking and moving with the horse. The objective is to maintain a contact with the horse to keep control, but the handler must understand that the there is no way a person is going to stand there and stop a bolting horse. Trying to stand in one place and hold the horse in that spot will result causing pain to the horse’s mouth, which could lead to greater panic. It’s also going to result in either the horse pulling the line completely out of the handler’s grip, or pulling the handler off their feet. The only way to maintain a bit of control, keep a grip on the line, stay on your feet, and allow the horse a chance to calm down is to keep contact with the horse through the line, yet move with him till he stops. I’ve had horses bolt while longeing, either from being startled or because they’ve realized that it’s possible to yank a line from a handler’s grip. Most horses that do this deliberately have learned to do so because the handler tried to stand still and stop the horse from running off. It doesn’t work. However, if you move with the horse, letting the line feed through your hands as needed, and keep just a firm pressure, the horse will calm down quickly if it’s been startled, or will realize that it is not able to pull the line from you, (and in fact, it’s uncomfortable to keep up that pressure) and they stop fairly quickly. Allowing the horse to move yet maintaining control will keep a startled horse from learning a bad habit and will discourage a horse from continuing to try his learned “trick.”

Lazy/Leaning
By far the most simple problem to fix is the lazy horse. This horse simply doesn’t respect the handler or the longewhip enough to work. Any horse will be lazy if they think that they can. In the case of the lazy horse the handler must increase the “asking” until they get a response from the horse. For some horses, this will only take a cluck and raising the whip’s tip. For other horses, you may need to “roll” the lash at their hocks. Some horses will need to be flicked with the lash before they are convinced they actually need to work. It’s important to get the horse’s attention and to make sure the horse understands that this is time to work, not play. A lazy horse can develop several annoying habits, such as leaning on the side reins, leaning on the longeline, and traveling on the forehand. Being lazy gives the horse time to think up other tricks to get out of work, such as turning and facing the handler and bolting.

Leaning on the side reins occurs when the horse is allowed to be lazy and lose impulsion. The handler must take care to encourage proper forward movement when longeing the horse. If a horse has side reins, a saddle or surcingle, a bridle or longeing cavasson, then the horse needs to be working, the same as any other work under saddle. Tacked up, the horse should not be allowed to play, buck, or be lazy. The only time I will allow the horse to be lazy or to buck or act silly, is if he is untacked with a line attached to a halter. The only time I do longe this way is after a long trailer ride, or after he’s been stalled for a longer time than normal for some reason. This is strictly to allow him to stretch his legs and work any kinks and excess energy out. After he is settled, I then tack him up properly and expect him to work. I’ve never had a horse not know and understand the difference, as long as the handler is consistent.

Leaning on the longeline most commonly occurs when the line is attached to a halter ring. This problem will generally fix itself when the line is attached properly to the bridle. If the horse does seem to be leaning on the line when the line is used with a bridle, the handler should make sure they are not keeping a “fixed” hand. Basically, the reason and the cure is the same when under saddle. The handler’s hand is fixed on the “rein” and the horse leans on it. The handler should start a gentle give and take with the line, maintaining contact with the horse’s mouth, while encouraging the horse to move forward with more energy with the longewhip. Simply do not give the horse something to lean on, and make him move forward.


Basic longeline work with a horse can be a great way to get to know your horse’s temperament, it’s way of going, problems with gaits or balance and what needs work. Observing your horse from the ground gives a rider a better understanding of how that particular horse moves and it’s likes and dislikes; seeing how a horse naturally moves without a rider will help with understanding any problems when the rider is in the saddle. It’s also a good way to create a rapport with the horse and to facilitate understanding, trust and respect between you and the horse.

The Basics of Cavalleties

Cavalleties are a wonderful tool that can enhance any training program. In this article, I’m going to talk about the uses and benefits of cavalleties.

Cavalleties are simply poles that are raised up slightly off of the ground. Most cavalleties have varying height adjustments for different exercises. Cavalleties are simple to build and can be easily constructed by anyone. The two most common designs are an X on each end of a pole, or a box on each end of a pole. When using the X design, two 2x4s measuring 2 feet long are secured together to form an X. The pole should be laid in the angle that the top or the bottom of the X figure makes and secured in place. Screws are best for this, since they hold better and won’t loosen and protrude out like nails can when they become worn and loose. With the pole attached to one end of the X, the X can be rotated so that the pole is on the bottom, low to the ground, or on it’s side, raising the pole slightly, or turned upside down, so that the pole is on the top of the X. The second design is a box design. With this design, one constructs a two-foot square frame using 2×4’s. Cut a 2 foot square out of sturdy plywood, and cut a hole just big enough to fit the pole through about 4 inches from one edge, eight inches from the opposite edge, and centered between the other two. Cut a second one to match, and attach them to the frame and run the pole through both holes. Again, the box may be rotated to raise or lower the pole.

The benefits to using cavalleties in flat work are numerous to both horse and rider.

Travelingacross cavalleties requires the horse to work harder than when traveling on flat ground, they must pick up their hocks and knees more, and depending on the distance between the cavalleties, they will need to step up underneath themselves more. Just negotiating the poles requires a horse to lower it’s head to see where it needs to put it’s feet, which promotes relaxation and allows the back to swing more freely. Poles with exact spacing will even out a horse’s rhythm. The engagement of the hocks, the suppleness of the horse’s back and the concentration necessary to negotiate cavalleties improves and develops the horse’s balance and impulsion. One can more easily teach a horse to shorten and lengthen it’s strides by changing the distances, slightly, between the poles. And lastly, cavalleties can teach a horse to approach an obstacle with confidence and ease.

The rider learns to relax and soften their joints to allow the horse’s spine to flex, and it can improve the rider’s balance and sense of rythm as the rider learns to adapt to the more energetic movement of the horse. As the horse works harder to negotiate the poles, the rider can more easily feel the “drive from behind” and allowing the rider to learn to sense the difference between when the horse is using it’s hindquarters and when it’s not. By changing the distances, the rider can learn to feel the true difference between a longer and shorter stride and not be fooled by the horse speeding up or slowing down the steps. Because the horse learns to move better, the rider has an easier ride. It’s so much easier to ride a horse that travels balanced and rhythmically. Working with cavalleties also helps the rider to develop an eye for distances and approaches, something which doesn’t come naturally for many people and must be practiced. This will help not only in learning to jump, but also anytime the horse and rider must negotiate uneven ground or natural obstacles encountered when trail riding.

None of these benefits will be evident, however, if the cavalleti work isn’t done correctly. Incorrect cavalleti work results in a hurried, tense, upset horse, and has no value.

When introducing a horse to cavalleties for the first time, it’s usually best to start with one pole, set as low as it will go. Walk and trot the horse over this pole until the horse is perfectly relaxed and calm and there is no hesitation. When the horse is unconcerned about going across one, then add another. Each time a pole is added, wait until the horse is unconcerned and relaxed before adding another one. Generally, there should not be more than three or four cavalleti poles in a row. Once you are using more than one pole, you will need to be sure the poles are placed the correct distance apart for your horse’s natural stride. Changing the distances in order to help change your horse’s length of stride should not be attempted until the horse is very experienced with walking and trotting several poles with a rider. Make sure the horse crosses a pole at every stride. Poles placed with one “empty” stride is more advanced, and should also wait until the horse is more experienced. An average distance between poles for a walk stride is around 2’6″. An average distance between poles for a trot stride is 4′ to 4’6″. These are average distances only and are just a place to start. Your particular horse may need them adjusted, depending on his size and conformation and natural way of moving. You must determine if your horse looks comfortable moving through the poles and if he seems to have to shuffle or “dance” through them, you should move them accordingly. Ideally, the horse’s hind hoof should land midway between two poles. I personally like to set up a horse’s first line of poles in an area that can be approached easily with a large gentle turn from either rein. Approaching and working from both sides is important.

Many people will first introduce the Cavalleties to the horse on the longeline. They feel that this is easier, physically, for the horse to deal with. Without a rider, the horse may find it easier to flex and swing the back and to pick the legs up higher. If you find that your horse is having a hard time getting across the poles while you are riding, this may be an option to try.

When you ride your horse across the poles, a posting or jumping position is best, especially in the beginning when your horse may be easily interfered with. A rider that causes the inexperienced horse to lose balance and/or rhythm when introducing the horse to this type of work may cause the horse to bang his legs or hooves painfully on the poles. This may certainly cause a horse to become upset or frightened and it will refuse to cross them, or cross them with tension or rushing, compounding the problem. People will often put leg protection on the horse when working over cavalleties, and while this will help, a sharp rap on the leg or hoof is still startling and can be painful. Plan your approach carefully to avoid having a wobbly, snake-y line. The approach should be several straight strides before crossing the first pole. The rider should concentrate on planning the route to create a balanced, uniform turn and keeping the horse rhythmic and energized. It’s to be expected that a horse will hesitate, initially, when approaching a line of cavalleti poles, but ideally, the horse should not lose rhythm or lose impulsion on the approach. The horse should feel bouncier and more energetic when crossing the poles, but the rhythm should stay the same as before and after. This is what the rider should be striving for. It’s often helpful to circle first to establish a steady rhythm, then move into the line of poles, then circle after the last one. When riding across the poles, the rider should stay balanced and relaxed and should keep their eyes up. Looking down at the poles causes tension in the spine and can displace the lower leg. Work the horse no more than 20 minutes over cavalleti patterns every other day. This is very difficult physical work, and a horse can become sore and tired. A sore, tired horse will not be relaxed and willing.

Once the horse has experience walking and trotting several cavalleti poles, and is confident and relaxed, you can start using them in your training. Cavalleties are an excellent tool to help improve your horse’s movement. Set the poles up one level higher for this work. As the horse pushes more strongly and with more energy of the hindquarters to cross the higher poles, concentrate on feeling the difference between that and the horse’s movement when not crossing the poles. After the horse crosses the last pole, try to keep that same energy and impulsion for as long as possible after clearing the poles. Even after the horse loses that feel, keep a steady rhythm circle around the ring for another approach. When you can keep the improved way of going for time after the poles, try asking for it on the approach to the poles. Keep asking on the approach, relax slightly through the poles, then ask more distinctly again after the poles.

Use the same principle for encouraging the horse to lengthen the stride. Keep the poles on the lowest height, but move them apart several inches. Establish a rhythm and approach the line. As the horse is crossing the last pole, apply the aids for lengthening and try to maintain the longer stride for as long as possible after clearing the last pole. When the horse falls apart, relax and simply keep a rythm around the ring and make another approach. Eventually, start asking for the lengthening on the approach. Vary the distance between several sets, and ask the horse to lengthen or shorten when approaching the appropriate set, and to maintain that length for as long as possible after.

With both of these exercises, you should keep the horse moving around the ring and across the poles for several circuits in a row. This helps the horse to learn rhythm and gives him time to understand what you are asking for. After several circuits, stop and walk around on a loose rein to give the horse a break. There are many patterns that can be used to improve the horse’s movement and way of going. Using them in corners helps the horse to work through a corner better. Setting poles so that there is one “empty” stride between poles will help the horse to learn to maintain his rhythm and length of stride on his own. The lists are endless.

Cavalleties can also be used in preparation for jumping. To cover a jump course well, a horse needs rhythm and balance. Set up three trot cavalleties in front of a pole laid on the ground between two standards. Leave one empty stride between the cavalleties and the pole on the ground. Trot the cavalleties and continue across the pole. Work on maintaining the rider’s jumping position and the horse’s rhythm. Again, continue on around the ring for another approach, concentrating on keeping the horse steady and relaxed. When this is going well, set up some cavalleties for cantering. To canter the cavalleties, they should placed about ten feet apart. Using three is generally best. The rider should stay balanced and light with the weight in the stirrups. Approach at an easy canter and keeping the horse steady and straight, concentrate on feeling the rhythm of the approach, the feeling of the takeoff and recovery as the horse bounds over each pole, and the departure after the last one. The rider should keep the upper body as quiet as possible, letting the joints flex and allowing the cavalleties to set the rythm. This is a great exercise to build confidence in both horse and rider.

For more patterns and uses of cavalleties for all levels, check out this website: http://www.geocities.com/Athens/Acropolis/…/8909/grid.html

A New Owner’s Guide to Spring Dangers

A New Horse Owners Guide To Spring Dangers

Well, with spring just around the corner, many horse owner’s thoughts turn to spending more time with their horses. But before you throw your saddle on your horse and jump on, there are some things that need to be thought of.

Equipment

Many people who live in areas that experience ice and snow and mud and don’t have access to an indoor riding ring have spent a great deal winter throwing hay and chipping ice, but not much time in the saddle. While the weather is still making up it’s mind to be good or bad, this is a good time to pull out all of your riding equipment and check it for damage.

Take your saddle and bridle completely apart, undoing all buckles and examine the leather. Pay close attention to areas that contact metal. Look for cracks and areas that are wearing thin. Small surface cracks will generally be okay with a good oiling. Larger cracks, however, may need repairing or replacing. Tug on the leather. If it stretches visibly, it’s a weak area, and it needs to be fixed. Clean the leather thoroughly and oil it. It’s usually best to spend money on getting a good quality product. Cheaper products often do not clean well or leave behind a residue. There are many good ones on the market, ask around at a local tack shop for quality leather care products. I use the Leather Therapy line of products and have found they work well for me.

If you use a western bridle, it’s a good idea, while you have your bridle apart, to replace small leather items that get a lot of wear. This would be chin straps and water straps on the ends of reins if you use them. These pieces get a lot of saliva and water abuse, as well as stress and sometimes, in the case of the water strap ends, chewing. If you use an english bridle, check the reins, looking for broken lacings or loose buckles or hooks. On any type of bridle, check all fasteners for stability. After a good cleaning, oiling and inspection, it’s ready to put back together.

To inspect your saddle, take the stirrups completely off and examine the place where the leather meets metal. When you straighten the leather out, does it crack? If so, you may want to replace it. It’s especially important to take a the western stirrups off and separate the leathers to examine them. It’s much easier to miss problem areas that may be hidden behind the fenders on a western saddle than it is on an english saddle where the leathers are in easy view. Check the billets for wear and excessive stretching on an english saddle, and on a western saddle, check that the cinch rings are firmly attached to the saddle and examine the cinch billets for wear and cracking.

Your Horse

Before you throw that gleaming tack on your horse and go for a ride, stop and take a good look at your equine partner. If you live in an area where winter includes snow, ice, mud or all three, you’ve likely had your riding time interrupted, sometimes for weeks at a time. Work, 
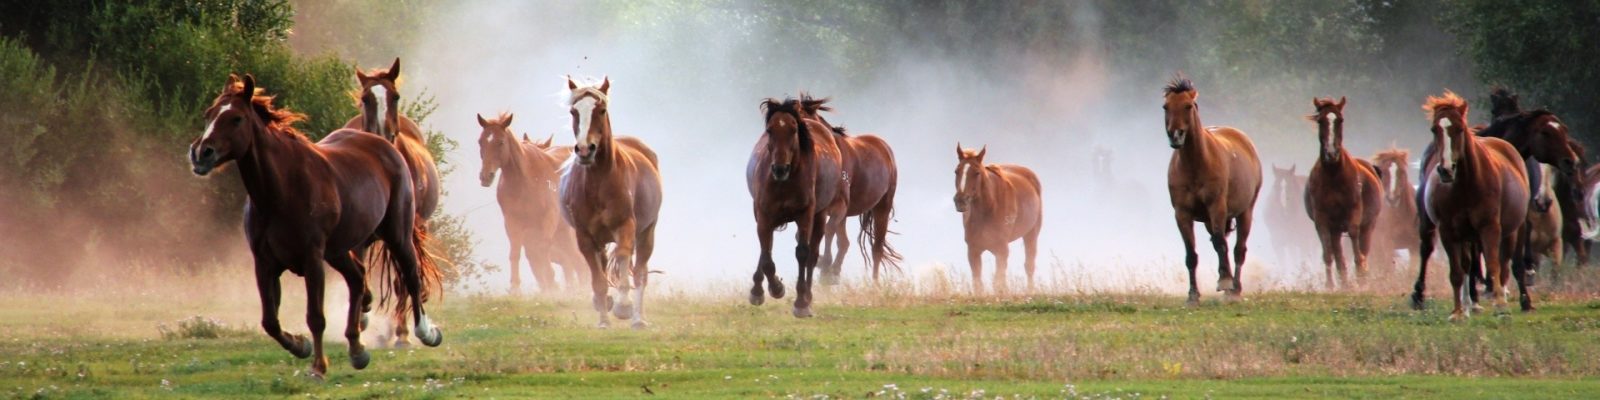
school, and lack of daylight hours can also wreak havoc with a consistant riding regimen. Simply throwing your saddle on and going out for several hours to enjoy the beautiful spring season with your horse can often end in injury to your horse. Despite how big and strong he looks, he is, in most cases, quite out of shape. While he could most likely tote himself around for a couple of hours with no ill effects, add a rider’s extra, shifting weight, and he could injure himself. It takes a great deal of strength to stop, start and turn on uneven ground with extra weight that also moves unexpectedly. Common spring injuries are sore backs, sore hocks, pulled muscles strained tendons and ligiments, bowed tendons and even tying up from over-exertion. Be aware that your horse needs time to get in shape. If it’s been a month or more since you’ve ridden your horse, spend the first month getting him in shape with lots of walking and some light trotting starting at 30 minutes and working up to and hour and a half. Once you get to an hour of working, you can start to add in some hill work, if you live in a hilly area. At an hour and a half, start adding some light cantering. When your horse can go for an hour and a half with walking, some steady trotting, and some occasional cantering without getting very out of breath or very sweaty, the danger of overextending himself or tying-up from exertion is minimal. If it’s been two or three months since you’ve ridden much, then spend about 6 weeks or so getting him in shape. Let your horse be your guide. Watch his breathing and his recovery. He should get just slightly out of breath, and be able to recover in a few minutes. A light sweat means he is working, a dripping, frothy sweat means you are pushing him too fast.

Footing

The ground itself, in the spring, can cause many injuries. Very often, warm, sunny spring days will be followed by cold, below freezing nights. This will often cause the ground to thaw, just slightly, on top, yet remain frozen a few inches down. A horse can easily slip in this situation and sprain or pull something, or even fall. Be aware of the ground you are riding on. Take a moment to dig down a few inches and see if there is a frozen layer. Beware of low-lying areas you may want to cross, such as gullys. These often collect water, which can lay just beneath the surface and freeze. In riding rings, walk around the ring and check for frozen patches. Dragging the ring before you begin serious riding in it is best, this will break up the surface, allowing moisture to drain and the ground to thaw deeper, and will eliminate low areas that tend to collect water.

Grazing and General Feeding

Laminitis and founder is a very real concern in the spring. If your horse is on pasture, one of the best ways to guard against founder is to make sure hay is available to the horse, during the first several weeks of grass. Very often, horses that are grazing spring grass will crave a drier, stemmier roughage and will seek out the hay. If it seems that your horse is not eating any hay, putting him in a grass-less area for half of the day will encourage him to eat the hay. For many horses, just having the hay in their digestive system is enough to counter-act the effects of the grass. During this time, you should keep an eye on the horse’s droppings. Bright green, sloppy loose droppings will mean that you should limit the time spent on the grass even more. If the droppings are a rich green, yet remain firm and form balls, then odds are your horse is doing fine getting acclimated to the grass. Also, during this time of fresh growth, you may want to cut back on any grain you are giving the horse. Spring grasses are very high in sugar and simple carbohydrates, which often results in the spring “sillies.” Cutting back on grains will help. If you do not have anyway of keeping a horse off of spring grass, if needed, investing in a muzzle is a good idea. Often, all a horse on pasture during this time needs is a mineral block. Spring grass is quite high in protein and most vitamins and of course, sugar, but somewhat low in minerals, so many horses do fine without any grain or other supplements at all except for a mineral supplement, until the grass begins to die back in the summer. If nothing else, a horse should receive a good magnesium supplement during this time. Magnesium increases the effectiveness of the insulin response to sugars. If you use a granular mineral supplement, a small amount of dampened beet pulp will often do the trick in getting him to eat it, and provide some extra fiber, too.
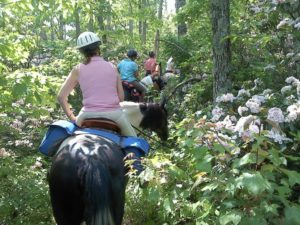
Spring is a wonderful time, and horses and people alike enjoy getting out and spending time together as the world comes back to life. Make sure this time is not marred by injuries by using common sense and taking your time to smell the……early spring flowers.

Training for the Trail

Training For The Trail

Trail riding can be great fun, and it can help with problems such as boredom and sourness in the ring. The benefits of trail riding can be an increased bond and greater trust between horse and rider, it can help a ring sour horse become more willing, it can help get a sluggish, lazy horse more forward. Trail riding can help teach a horse balance and agility and builds strength and stamina. However, one can’t just take any horse out on the trail, particularly if the horse has been used to a ring all it’s life. Taking an unprepared horse or rider out for an afternoon trail ride can not only be unpleasant and frustrating, but can easily become frightening and lead to disaster. In this article, I will tell you about the things I’ve found to be important for a horse and rider to know when wanting to get into trail riding that involves more than just a hour’s walk around the local fields.

In my more than 35 years of trail riding, my horse and I have covered a wide variety of terrain in all types of weather. We’ve been caught at the top of mountains in lightning storms, been struck indirectly by lightning, we have fallen off of a cliff, been caught in a quagmire, fell through seeming solid ground to an underground creek, gotten lost numerous times, had equipment breakage, episodes of companion’s horses tying-up on the trail. Once a friend and I had to race for help when one of our group fell off of her horse during a gallop and was seriously injured (that situation ended with a helicopter coming to take her to the nearest hospital), several times I’ve had to lead horses home when the rider was incapacitated, doctored horses injuries on the trail, as well as many more minor situations too numerous to list. From my experience, I hope to help other people and horses be prepared for this challenging and exciting activity. Because in my opinion there is nothing more physically and mentally demanding than a serious trail ride, nor an equine activity that is has more chances for encountering surprises. The situation is ever-changing, there is no constant. If you are looking to add spice to your riding, if you are bored with what you have been doing, trail riding may be just what you and your horse need. However, as I’ve mentioned, trail riding has it’s dangers. There will always be an element of risk to trail riding, so it’s best to be as prepared as possible. Being properly prepared will give you the confidence to go out and have a fun, relaxing ride, the confidence to tackle mountains and rivers; challenging horse and rider’s mental and physical fitness.

One thing I want to clarify, before I go any further, is that for the purposes of this article, I am assuming that the horse and the rider at least have a solid foundation of basic training. If a horse is going to start training for the trail, he should be very well-grounded in the principles of moving forward freely and energetically and accepting contact with the bit, has quiet balanced transitions and is rhythmic and relaxed at all gaits. In other words, the horse should should be at a level of training where the rider can apply the basic aids and the horse is willing and able to respond.

Keep in mind, that there are many ways to teach a horse a skill. I am only going to discuss what has worked best in my experience, and what instructions I give will be very basic outlines.

Mounted Skills

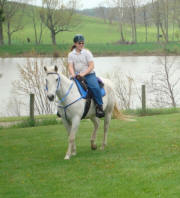
There are several maneuvers that a horse and rider should know and be able to perform without confusion or resistance. Nothing will shake a rider’s confidence quicker on a trail than not being able to control their horse properly. By this, I don’t mean that the horse is is uncontrollable, or that the rider is overmounted, but that the rider realizes what the horse needs to do, how the horse needs to move to get out of a potentially dangerous situation, yet also realizes they they themselves have no idea how to ask a horse for this movement nor does the horse know the cues. The situation does not even need to be particularly scary, either. If enough small problems, struggles, and frustrations occur, if the rider (or the horse) is constantly feeling unsure of themselves, confused, and feel as if they are not communicating with each other, they both can become discouraged about trail riding in general.

Neck Reining

Neck reining is something that is very handy for your horse to know. It’s not critical, but it sure can make things easier. Many times, if the trail is overgrown, I’ve pushed branches out of the way while maneuvering around large rocks or fallen trees or saplings growing in the trail. Often, we will use small, hand-held nippers to clear overhanging branches out of the way as we ride down an old trail. Neck reining allows us to clip as we walk. I’ve had to sometimes lead someone’s horse and neck reining is invaluable to maintaining control. There are also many little instances, such as drinking from your water bottle, or looking at a map, a GPS, or a compass. It’s not difficult to train a horse for basic neck reining. All one needs is a fence or building.

Walk the horse alongside the fence, staying several feet away from it. With the rein closest to the fence, ask the horse to start turning into the fence. Make sure that you use your weight, seat, legs and eyes properly when you pick up the rein. It’s really these aids that will help neck reining make sense to your horse. As the horse begins to turn into the fence, and you feel him set back on his haunches, use your outside leg to keep him activated and as he moves into the fence, release the direct rein and lay the outside rein on his neck. Push him firmly through the turn with your leg. Look in the new direction. At this point, the fence helps to finish the turn and keeps him bending, so releasing the inside rein won’t result in him straightening out. Make sure you release the direct rein as soon as he is committed to the turn and apply the neck rein for the rest of the turn. This way, the horse learns to listen to the neck rein, and not continue to depend on the direct rein. I will work back and forth along a specific section of the fence, always asking for the turns at roughly the same spot. Soon, the horse will start to anticipate turning into the fence as he approaches that area. It will become easier and easier to start your turn with the neck rein. Lightly bump the inside direct rein as needed to help bend the horse in the desired direction, but drop the contact the instant he gives to that direction. Keep the neck rein steady. Basically, you want the direct rein to become just a back up to the neck rein; eventually, it will not be needed.

Backing

I can’t say how many countless times I’ve been thankful for a horse that knows how to back quietly and will steer while backing. Some of the situations could have become nasty had my horse not been willing and quiet when I asked him to back out of something. Unfortunately, very few horses actually know how to back correctly under saddle.

Backing is best taught from the ground first. With the horse bridled, stand facing the horse, holding the reins in one hand. Take up some contact with the horse’s mouth and at the same time, lightly push on the horse’s chest. Give a cluck or tell the horse to “back.” When he takes just one step, praise him and walk forward for a moment. Stop and try it again. Your horse should back by relaxing his jaw, softening his neck and stepping backwards with a regular, even, confident step. Work on the ground until he will easily back correctly. From the saddle, the cues are to sit with your spine “braced” (this discourages forward movement), take up contact, then ask for movement with your legs. If you feel your horse rock forward as if to take a step forward, close your fingers on the reins. Do not, however, pull backwards on the reins. This only creates pain at the horse’s mouth and results in tension and resistance. One cannot “pull” their horse backwards. The horse moves backwards because the rider’s legs ask for movement, yet the spine and hands prevent him from going forward. The only direction left to him is backwards. The energy for a movement always comes from the rider’s legs, never the reins. For many, it’s very helpful to have a ground helper for the first try from the saddle. Have the helper stand in front of the horse, facing the horse, and push on the horse’s chest. Very quickly, the horse will learn the cues from the saddle. I suggest having a helper until your horse will back correctly and quietly. When the horse will back well in a straight line, then begin working on backing while changing directions. Poles on the ground to maneuver through, as well as barrels to back around are helpful.

Other Handy Mounted Skills
Leg yielding, sidepassing, turning on the haunches, and turning on the forehand are also very good things for the horse to know. When the horse moves too close to trees or holes or you need to pass something over to another rider, a sidepass (or even a leg yield) makes it easier to move the horse as needed. Many times, I’ve rode with friends who’ve had their knees banged up because the horse does not know how to move over sideways. Working your way through brush, avoiding roots, trash, and holes are all easier with a horse you can maneuver with your legs. The turns on the haunches and forehand are nice for doing an about face on narrow trails and moving through gates.

Turn on the Forehand
The turn on the forehand is the easiest one to start with. Begin on the ground. With the rein closest to you, gently tilt the horse’s nose toward you. While holding the rein, use your other hand to press on the horse’s ribcage, asking the horse to move his hips over. Work on this until the horse will cross the back legs over without moving forward. From the saddle, the aids are: Outside leg (the one toward which the horse will be moving INTO) is slightly away from the horse’s side, rider’s weight is heavier on the outside seatbone, outside rein is simply light contact (ready to stop forward motion, if needed), inside leg should be moved back a couple of inches toward the haunches, and is active (pushing) at the ribs, inside rein is keeping the horse slightly flexed around the inside leg. In the beginning, ask for only one or two correct steps, stop and praise. Walk around for a minute, then stop and ask for the turn on the forehand again. Eventually, build up to being able to pivot the horse 180 degrees.

Leg Yielding

From this, you can start to teach the leg yield. The objective of a leg-yield is to have the horse cross his legs over and go sideways while also walking forward. A very handy thing for avoiding obstacles on the ground or at the rider’s head level. Also handy for passing snacks from rider to rider. Ask the horse for a nice, forward walk. As he is walking, shift your weight into the direction you want him to go. Lets say we

want the horse to go to the right. The rider should sit heavier on the right seatbone, the right leg should be slightly away from the horse’s ribs, the rider’s left leg should be pushing firmly on the horse’s ribs, a little behind the girth. The right rein should have contact with the horse’s mouth and be opened into the direction of movement to “lead” him in that direction. The left rein should be gently flexing the horse’s nose to the LEFT, and holding the flex, with the rein brought close to the horse’s shoulder. This is called an indirect rein and encourages the shoulders to move over. An example of when a rider would use a leg-yield would be when the rider notices that their knee is in imminent danger of connecting with a tree. If you pick up the opposite rein and pull the horse’s head or even neck rein the horse away from the tree, the horse may turn (or not!) but in doing so, creating a turn/bend away from a tree bends the horse’s ribcage (thus your knee) INTO the tree as you pass by it. Leg-yielding away, however, moves the ribcage (thus your knee) AWAY from the tree. The horse will also be more willing to leg-yield over because it will not be turning his head away from following the horse in front of him.

Sidepassing
Sidepassing is similar to leg-yielding, in that the horse will cross the legs over, but when a horse is sidepassing, he will only be going sideways, without forward motion. Once a horse knows how to leg-yield, teaching a sidepass won’t take long. Use a fence rail or the side of a building. Stand the horse short distance off, and ask for a leg yield. As the horse approaches the fence, keep applying the leg and weight that asks for sideways movement, but allow the horse to straighten up. As the horse gets close to the fence, gently prevent him from turning. Keep him facing the fence by holding the reins wide apart. As the horse shortens his steps, keep your active leg pushing firmly while you maintain equal contact with both reins. When the horse moves sideways more than he moves forward, praise him and allow him to turn and walk off. Come back in a minute to try again. When training for both the leg-yielding and the sidepassing only ask for a few steps at a time, slowly build up to more, and always make sure you work in both directions.

Unmounted Skills
Now, what happens when you have to get off of your horse while on a trail ride? No matter how easy the ride, there will probably come a time when you need to dismount to fix something, even if it is just to tighten your saddle. Many things can require you to get off of the horse while out on a trail. You and your horse must be able to work together on the ground as well as when mounted. Here are two skills that are often overlooked when people are training for the trail.

Standing Quietly and Patiently
Often, when dismounting on a trail ride, there is no adequate place to tie the horse to. One of the most common reasons people need to dismount will be to examine the trail or obstacle in front of the horse to make sure it is safe to cross. Sometimes, you may need to clear things off the trail. A horse that jigs and dances and won’t stand still in line while someone else gets down is dangerous, particularly if there is not much room on the trail. One’s horse should stand still, quietly and patiently, when the ride has to stop for some reason. If you are the one that needs to get down, you don’t want your horse to fussing and fidgeting, either when someone is holding his reins/rope or if you have to tie him. You may not have much room to mount or dismount, and a horse that moves at the wrong moment during a mount or dismount can cause you to fall. You may need a rock or stump to help you mount, and a horse that stands still where you tell him to will make things much easier. If your horse gets his legs caught in something, being able to cue him to stand still may prevent serious injury while you free him. There are several ways to teach the horse to stand still on command. I will give you the technique that has worked best for me with any horse I’ve taught.

Get a longe line, and some treats, and go somewhere where you both can concentrate. Stand your horse in one spot, and come up with a specific cue to mean that you want him to stay still. I usually use the word “stand” at the same time I jiggle the line attached to the halter. Take one step back and pay close attention to the horse. The objective here it that the horse is not allowed to shift his feet. As soon as he takes a step towards you (or away, or whatever), tell him a sharp “no,” and give a jerk on the line, and move his foot back to the same spot. It he moves two steps, then move him back two steps to the same spot. Now here is where timing is critical. When he has stood for a SHORT time past his usual standing time, then reward him, and take him for a short walk. After a minute, stop, and set him up again, and give him the “stand still” cue, and take a step back again. Do this ad nauseum until over time, you can step back farther and farther, and he is standing for longer periods. With a longe line, you can get quite far yet still have control if he should start to leave. When he is doing well in your practice area, and this may take several days, then take him somewhere more distracting and do it again. My horse will now stand out in my yard with all that grass around him, while I go into the house to answer the phone, and not move. I can tack him up anywhere without needing to tie him, and have left him standing on the trail to move brush. He stands in a trailer quietly, and most importantly, he will stand like a rock while I put him anywhere to mount. I have mounted off of car bumpers, rocks, stumps, fences, fallen trees, anything that is available. I have told him to stand and have removed vines and hidden old wire fence that has gotten wrapped around his legs. So you can see, the ability to stand on command is very important. It’s not hard, just time consuming, and you have to be CONSISTENT with expecting him to stand every time, without moving one foot. If you allow one foot to move before you say so, he will not grasp the concept.

Leading Out on the Trail
Quite likely, however, at some point you will also need to dismount to lead your horse over something. Even nice, easy trails can have a tree fall across them, causing you to have to work your way around it. In some cases you may need to dismount to get past or over something. There have been times I’ve had to dismount and lead to cross very rocky ground or go down a hill that was slippery. Your saddle may slip and you find you are not at a place where you can stop and fix it and so must lead the horse to a better spot. Many times, I’ve seen people need to lead a horse over something, yet they have a very difficult time doing so. You see, leading a horse over an obstacle is very different than leading your horse in from the pasture. When you train a horse to lead under most circumstances, you want the horse to walk at your shoulder. You want the horse to walk when you walk, and stop when you stop. If you move to one side or the other, the horse should turn with you. When leading over obstacles, though, this could be dangerous. If the horse is too close to you and you lose your footing you may get stepped on. If the horse stumbles or starts to slide going down a hill, and he is directly behind you, you may get trampled. Most importantly, however, when a horse needs to (or you suspect he might) jump something to get across it, it is imperative that you be out of the way when the horse jumps. This requires the horse to stand and wait for a cue to move forward, allowing time for you to get across the obstacle and out of the way.

There will be times that you will want the horse to be able to walk directly behind you, such as when the trail is narrow, or far out to the side, away from you, such as when going down a hill. Therefore, it is very important to spend time teaching the horse how to lead and how to move according to his proximity and placement to you. Let me give you some examples of what I mean.

If I place my horse directly behind my back, as I would need to do when leading him down a narrow trail, he will walk when I walk, slow down when I slow down, pause when I pause. I don’t have to look back, and there have been times when I have even left the reins tied to the saddle. I have taught him to play “follow the leader” when he is placed directly behind me. Now, when I place him out to the side, as he needs to be when we are negotiating a steep hill, he also knows to move as fast or as slow, or to stop altogether to stay right beside me. The difference is that he knows to stay off to the side and pick his own way. He only needs to keep his head even or slightly behind my shoulder. For crossing obstacles, I give him the “stand still” cue, then with a sufficiently long lead, I cross whatever I need to, while he waits. Then with a cluck and a tug, I cue him that it is now his turn to cross.

None of this is difficult to teach, it simply takes time. Work with the horse in an enclosed area to begin with. Use brush, tarps, poles, etc. to lead across. I’ve used ramps, see-saws, and bridges that we’ve built for this purpose. I’ve also hung up tarps and strips of plastic, hung either horizontally or vertically, and led the horse through and under them. Practice until you and the horse can do these things without needing a leadline attached to the horse. Some extra benefits to this training is that it’s a great way to build a very strong bond and a very high level of trust between you and your horse. Trust and respect between horse and rider is probably the most critical element to having a good trail experience.

It will also help with issues such as trailering and poor leading/ground manners. For many people, being able to get their horse onto a trailer and hauling the horse out to the country is the only way they would be able to attend a trail ride. If a horse will trust you and follow you anywhere, he will follow you up into a trailer.

Trail riding is great fun for horse and rider if both are prepared. I hope this article has helped give people ideas and tips on what training they may need to focus on to improve their overall level of confidence and joy on the trail.